
A great, functional beginner project to use up fabric scraps
By ALDONA BIRD
Newsroom@DominionPost.com
Wait! Don’t throw away those scraps of towel fabric leftover from last week’s hair wrap. Follow these directions to continue upcycling fabric until you have nothing left to throw away.
DIY potholders are a great beginner/intermediate sewing project and a great way to test and get to know a sewing machine or to get more comfortable with sewing by hand. Bonus, you can practice quilting and piecing and try new stitches, then make them into a functional object you’ll see and enjoy every day.
Potholders and oven mitts also make great gifts, especially when paired with a locally made wooden spoon and homemade cookie mix.
Supplies needed for DIY potholders, cloth trivets or oven mitts:
- Fabric
- Scissors
- Bias tape
- Sewing machine or needle
- Coordinating thread
Many directions online call for insulating batting, and while it’s a good option if you already have it, it is not necessary to make a safe and effective potholder.
Made specifically for DIY potholders, heat resistant batting has polyester, a foil type sheet with poly batting on either side. If using, you must have a thick layer of natural materials on either side. Many types crinkle when bent, so your pot holders will have sound effects.
Natural materials are a must when making potholders. Uncovered polyester fabric will melt if in contact with your hot pots and pans.
Cotton, linen, hemp and wool are great options. Wool is self-extinguishing, so it is particularly safe for kitchen uses.
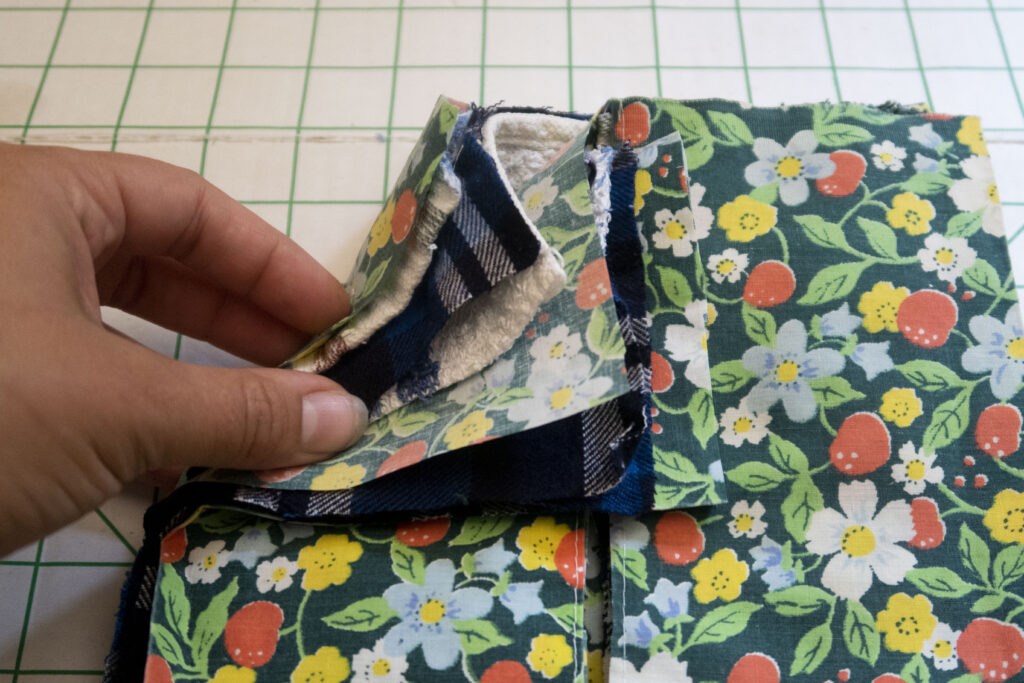
Fluffy fabrics stay cool longer than tightly woven fabrics. Old bath towels, non-threadbare kitchen towels, terrycloth scraps, cotton batting, flannel and such fabrics are good options for the inside layers.
Linen and quilting cotton work well for the outer layer — pick fabrics that compliment your kitchen décor and style to really personalize your potholders.
Use new fabric or consider cutting up and giving new life to no longer wearable clothing, and old bed sheets and linens.
Experiment with different layering of your available fabrics. Keep in mind that too many layers will be difficult to sew.
If you are planning to make a trivet to protect a table or counter surface from warm dishes, you probably don’t need even this many layers.
To make potholders/trivets/oven mitts:
Cut fabric to desired size. Seven or eight inch squares or rectangles make convenient potholders and trivets. Or make a long rectangle (26 to 32 inches long), with a thumbless mitt on each end is also a handy tool for removing larger casserole dishes from the hot oven. Make pockets on one side of a potholder for extra finger and thumb protection.
If making an oven mitt, cut all your layers into two groups of rectangles larger than the size you want for a mitt.
Secure inner layers with a few seams. Pin outer layers (outer sides out) flat to the inner fabrics. Starting at one corner, sew across all of the layers diagonally to the opposite corner. Sew parallel lines diagonally, working your way out from the first one. If you start at the edges, you will end up with puckers in the fabric.
Turn the fabric, and repeat sewing the diagonal lines, perpendicularly to the first. If your machine has decorative stitches, this can be a creative way to utilize them. Or instead of crisscrossing straight lines, make swirls or loops by freehand sewing.
At this point, if you are making an oven mitt, cut out the oven mitt shape. If making a potholder or trivet, cut the edges to neaten them, straightening uneven edges and cutting off thread ends.
Using bias tape (must be 100% cotton!) or other natural material, ribbon or edging, sew one side of it all around the edge of the potholder, or the wrist of the oven mitt. Leave a few inches extra of the edging at one corner.
Fold the edging material over, and sew it down onto the other side, enclosing all the layers of your potholder/trivet/oven mitt. Sew the extra into a loop, for hanging on a hook for display and easy access while cooking.
Snip off any loose threads. Set aside to add to a kitchen-themed gift set, or use when cooking your next meal.
Tweet @DominionPostWV
