By ALDONA BIRD
Newsroom@DominionPost.com
With spring in the air and Easter just around the corner, it is a great time to get creative with decorating eggs. Even if you don’t celebrate the upcoming holiday with egg dyeing, exploring natural dyes can be a fun science and art project for all ages.
You can dye with many items likely found in your kitchen if you want to skip or supplement conventional coloring kits this year.
To take egg dyeing to the next level, you can create patterns on the eggs with a variety of methods. Drawing with melted wax on the head of a pin (stick it into a pencil eraser for ease of holding) as a resist to the dye before dyeing or scratching the dye off with a sharp point to make a design can yield lovely results.

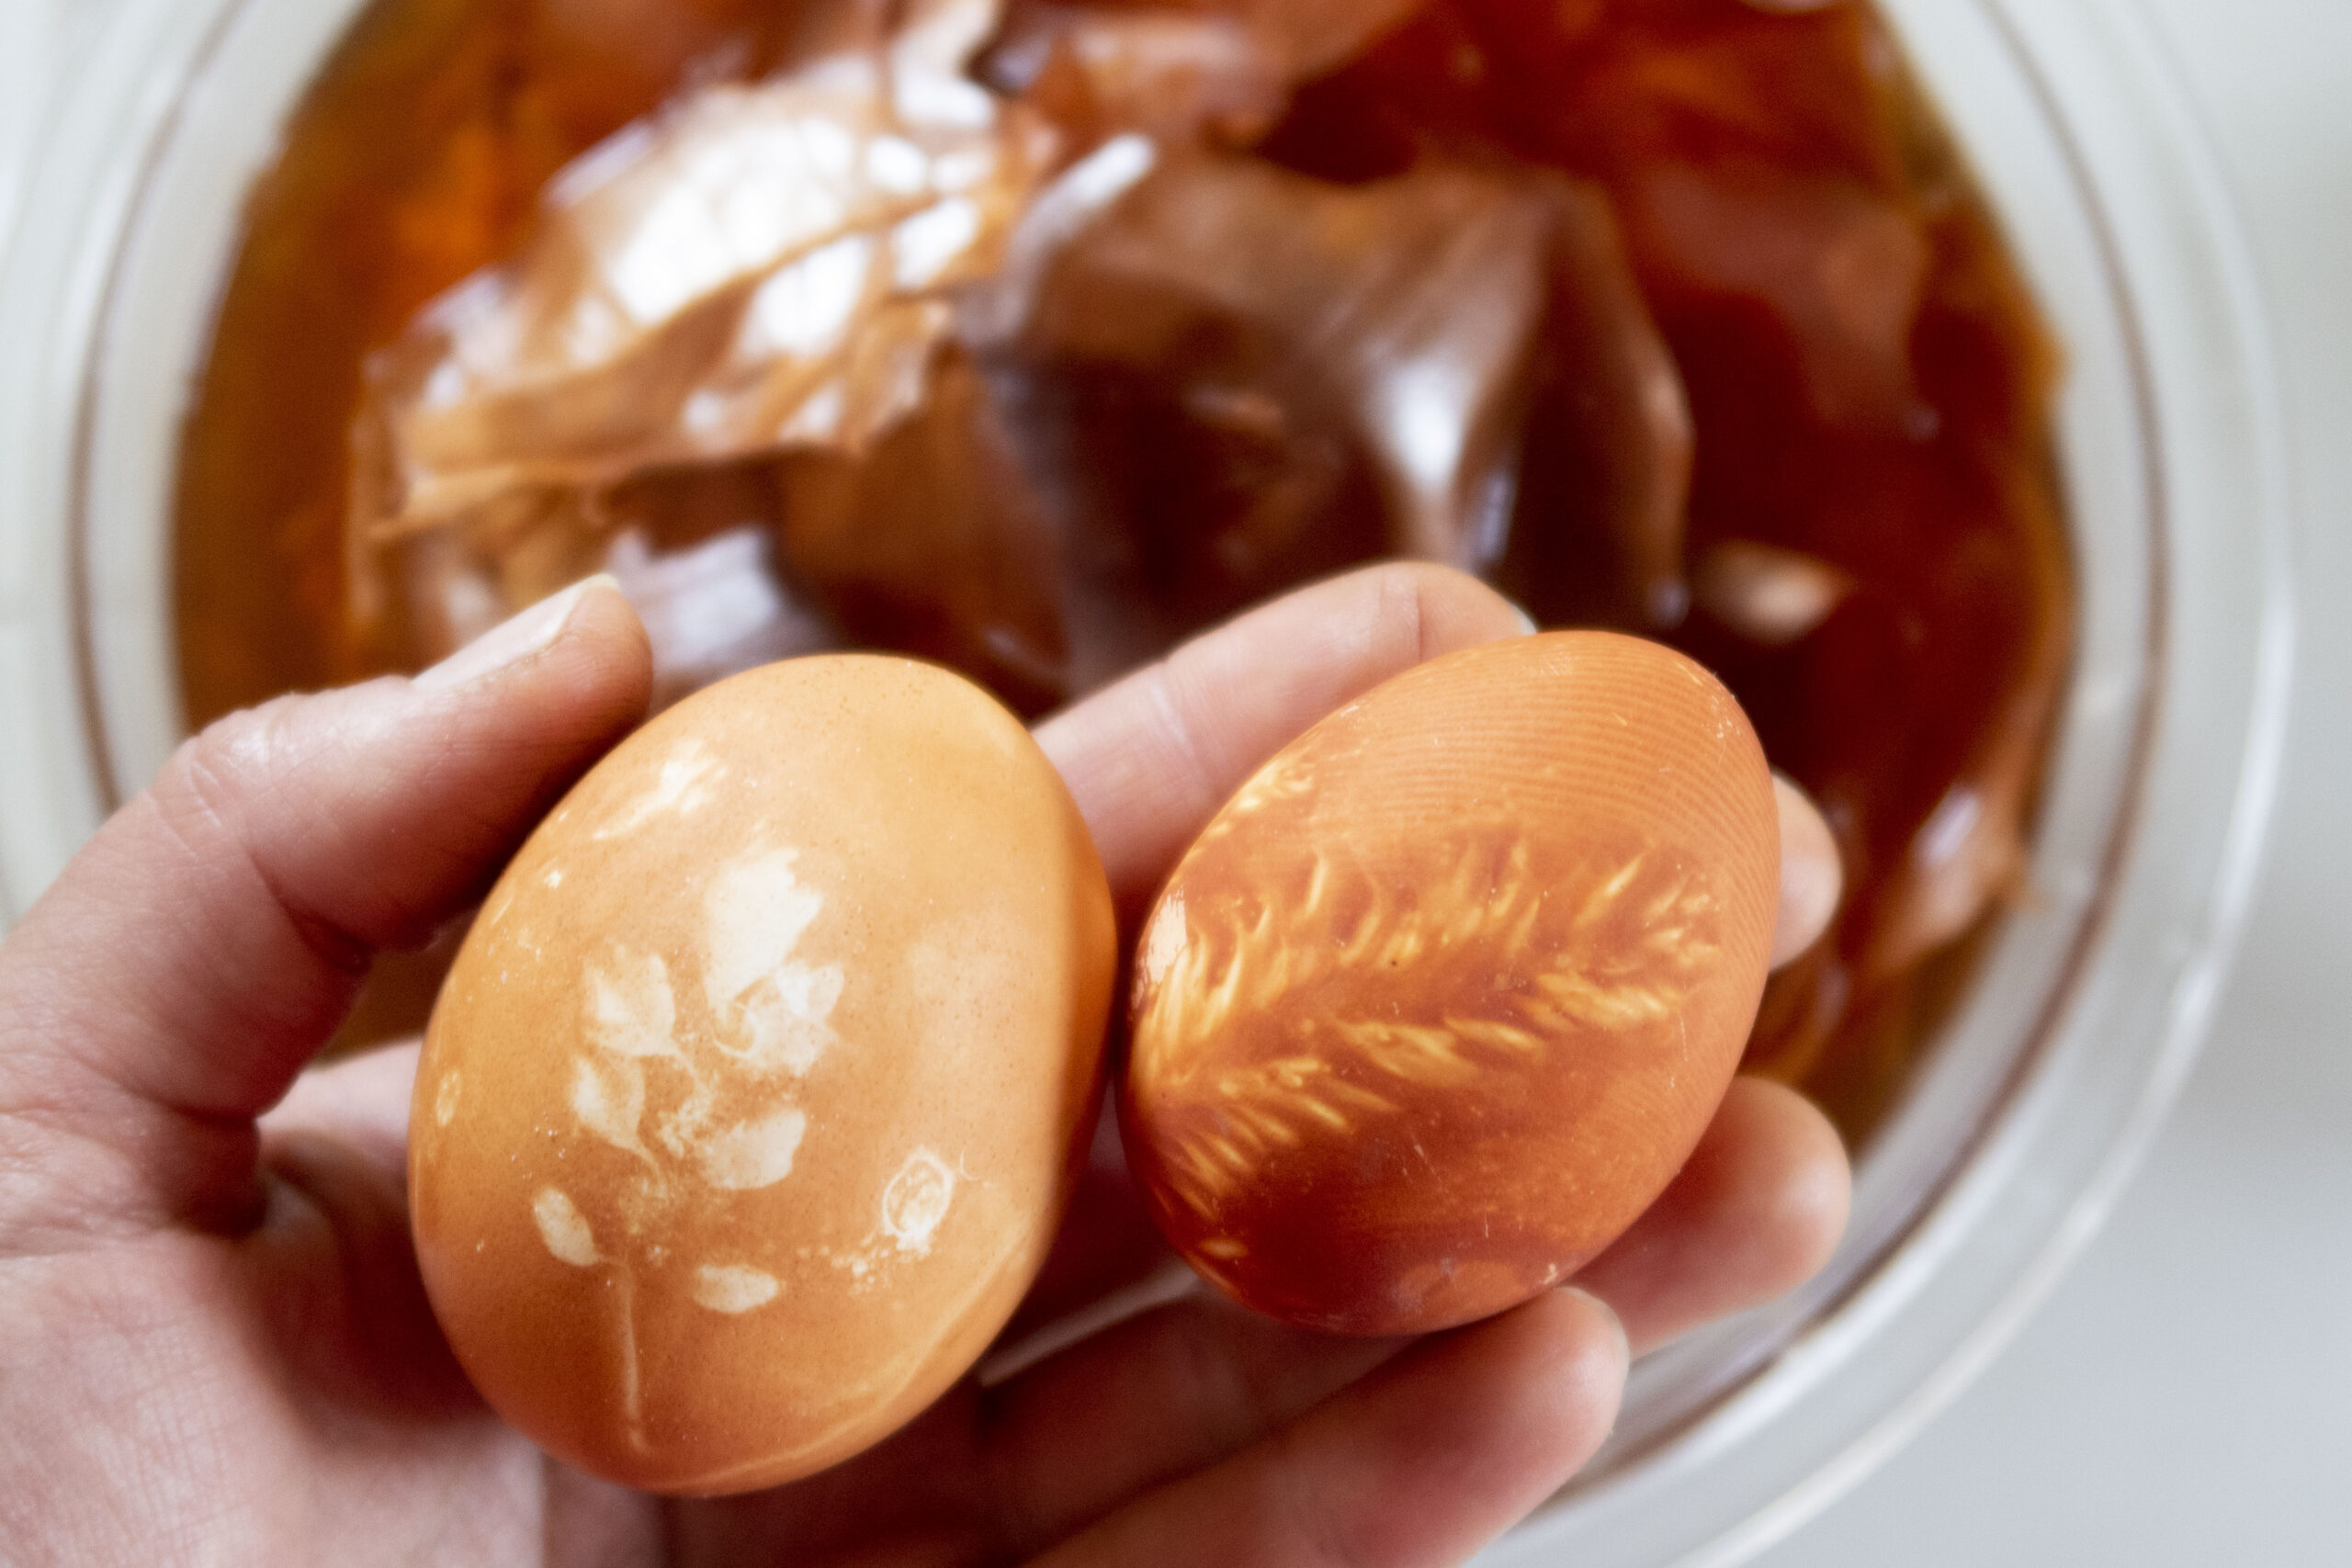
Leaves and flowers popping up to revel in springtime can be used to create relief patterns on eggs.
You will need:
- Pots and pans
- Red cabbage, red onion skins, beets, black walnut hulls, spinach, turmeric, etc.
- White eggs
- Small leaves and flowers
- A pair of old pantyhose or other thin fabric
First, prep your dye baths. The above-listed veggies and such yield great dyes. Add the material you want to extract a dye from to a pot and cover with water. Warm the pot, and let simmer until the water is a deep color.
Adding vinegar to many dyes can help it intensify and stick better to the eggs. But adding baking soda to others can change and intensify the color — red cabbage is such an example. Lowering the pH of the cabbage bath will turn the dye to blue.
Onion skins make orange dye. Beets make pink. Black walnut makes a dark brown. Turmeric makes yellow. Spinach, when concentrated, yields green. Berries also create bright colors.
Turn this into a science project by boiling different materials in water, splitting the batch into three and keeping one as a control, adding vinegar to one and baking soda to the last. Let an egg sit in each for the same amount of time, and see how the dye varies.

Once your chosen dyes are ready, head outside and pick leaves and flowers — you can use this as an opportunity to identify what is growing in your area.
Small leaves and flowers work well as multiples pressed on eggs.
Cut an old pair of tights into roughly four-inch sections (other fabric can work as well, use any lightweight material you have on hand). Tie one end in a knot, and slip an egg inside.
It is easier to arrange the flowers and leaves if the egg is damp. Slip the flowers and leaves onto the egg under the fabric. Tie the fabric shut to keep the materials in place.
Leave eggs in dye for anywhere from a few minutes to 24 hours. The longer the egg is in the dye, the deeper the color.
If you plan to blow out the eggs (poke a small hole on either end and blow through one to make the white and yolk run out the other), put the eggs in a cold dye. Blowing the eggs out will allow you to keep the decorated shell as long as you want.
For a deeper color, boil eggs in the dye. This, of course, cooks the egg, so it will only last until it smells.
Use different methods to create patterns and several dyes to make a lovely display for spring.
Tweet @DominionPostWV


