
Confined to our homes this Easter, with egg hunts and other community holiday events cancelled, we can still have fun with materials likely found in our kitchens. Take this time to learn more about Easter and other springtime holidays in your family’s culture, or try a new tradition.
Whether you celebrate the religious aspects of Easter, egg decorating with natural dyes can be a fun activity merging art and science.
A surprising number of produce, spices and other foods yield colors that work as egg dye. Beets, purple cabbage, turmeric, coffee grounds and onion skins are great places to start.
To make natural dyes, add the color source (such as onion skins) to a medium sized pot with water, and bring to a gentle simmer. Continue simmering until the color of the water deepens.
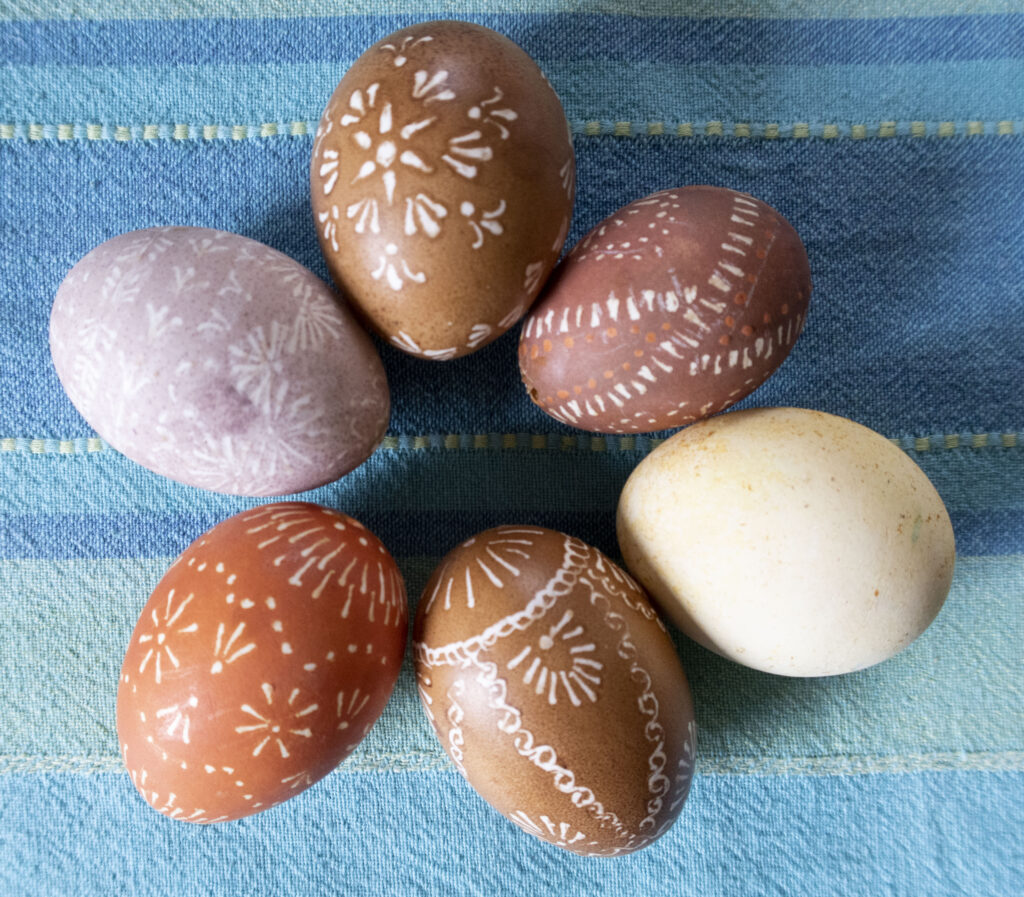
Onion skins (brown, from the outermost layers of yellow onions) will yield a range of orange dyes.
Beets yield pink or purple. Turmeric makes a very pretty yellow, coffee produces shades of brown, and red cabbage mixed with baking soda will turn eggs a beautiful blue. Try red wine, blueberries, black beans, parsley or other colorful foods for a variety of colors.


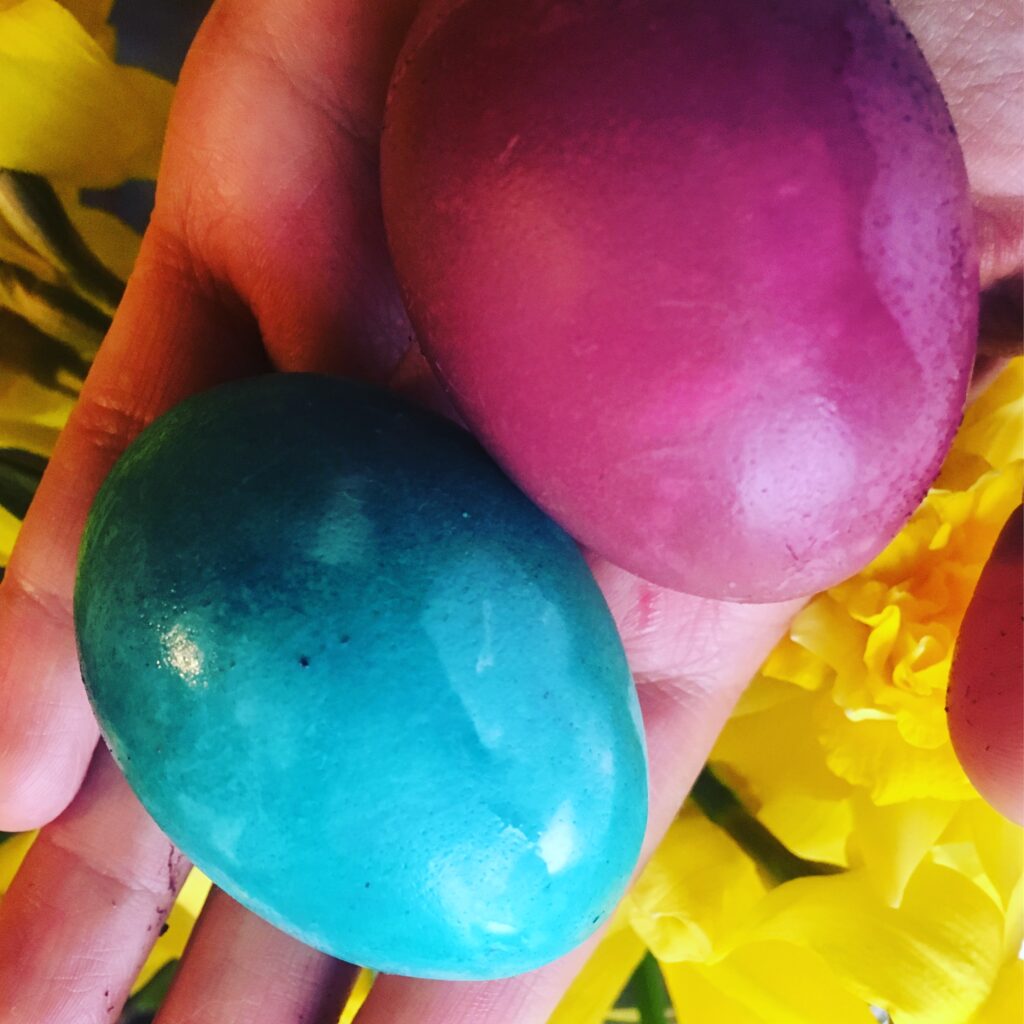
Adding acid (vinegar) often intensifies color, but some — like red cabbage — work better with pH raised by adding baking soda. Separate each dye into three batches (each enough to fill a mug or jar big enough to soak an egg), and experiment by leaving one as-is, and changing the pH of each of the others.
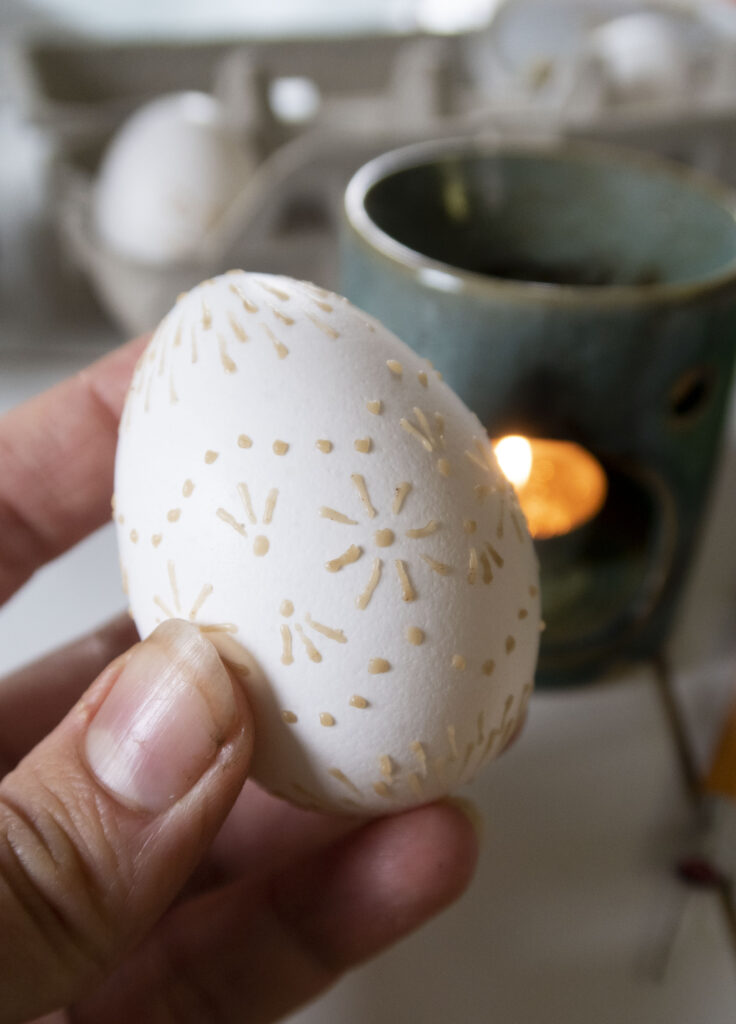
For fancier eggs try a batik technique by adding a resist to keep colors off chosen parts of the egg.
Flowers and foliage work as resists, by pressing them to eggs, held in place by a four-inch length of pantyhose or other stretchy and sheer material tied snuggly around the egg before immersing it in a dye bath. String tied around the egg in a pattern will also act as a resist.
Bees wax or other wax can also be used to create patterns. To create fine detail, melt the wax (a candle operated wax warmer works great), and use a pin stuck into the eraser of a pencil as a tool to create dots and lines on the egg shell.
Create designs, dye the egg, add more wax designs and dye again for a multi-colored effect. If using bees wax, or other wax that is not white, brush it off when the egg is finished to reveal the white or other colors underneath.
Boiling the eggs in the dye creates the deepest and richest colors. But if you want to preserve decorated eggs longer than a hardboiled egg can remain stink-free, soak raw eggs in cold dye baths. Soak for 30 minutes to overnight for a gradient of colors.
Once your eggs are dyed, use a safety pin to poke a hole about an eighth of an inch in diameter on either end.
Holding the egg over a bowl, blow into the top to force the egg white and yolk through the other end. This will leave the delicate egg shell empty and preserved.
The Easter Bunny was never more creative than when quarantined!
By Aldona Bird
