BY ALDONA BIRD
This Valentine’s Day you can skip the out-of-season roses and show your sweetheart how much you care with a handmade gift.
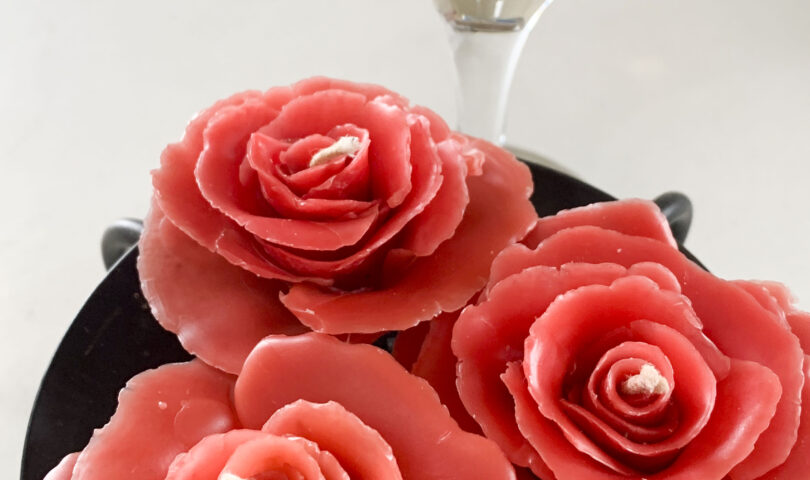
Keep the romance of roses and candlelight with this DIY project that combines the two — rose shaped candles.
To make your own candle roses you will need:
wax
colorant
aluminum foil
a spoon
candle wick
metal container which fits inside a sauce pan
Gather your materials – you have several options for wax: bees wax, soy or paraffin. Before you run out to buy supplies, consider whether you already have some. Old candles (especially if they are partially burned and could use a refresh) are a great way to upcycle wax for this project.
To color wax you can use herbs and spice to go all natural. Saffron, cinnamon, turmeric and paprika are options you may already have in your kitchen. Powders can be added directly in, or larger whole herbs can be placed in a cloth or coffee filter bag and infused into the wax.
Candle dyes are also available for sale online or in some craft stores in flakes, liquid or blocks.
Another way to add color and use materials you may already have is to melt in small amounts of crayons — a great way to use those broken stubs rolling around in your art supply box or drawer.
You can buy wicks or experiment with making your own. If you make you own use cotton thread (such as embroidery thread, but braid three pieces to make it thicker) or twine made of any natural materials.
You can also use other materials for wicks, such as thin slips of wood or the twine handles on gift bags.
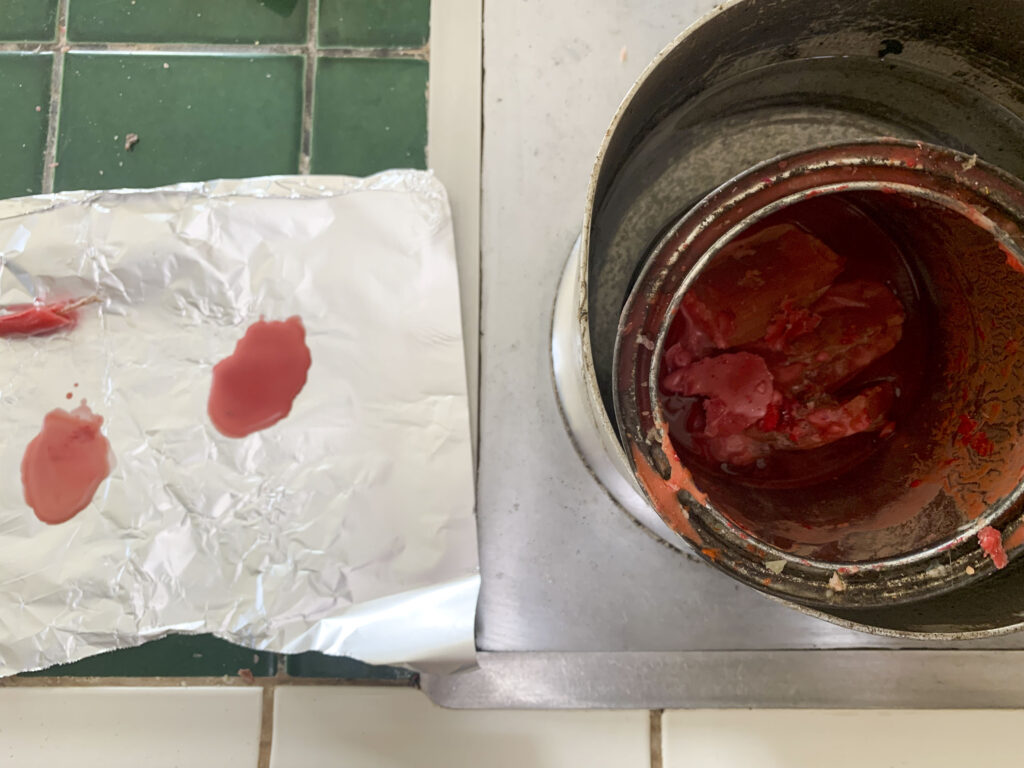
Once you have all your materials together melt your wax. Melt wax on the stove top by putting it into a metal container (such as a tin can), and then put the metal container into a sauce pan with water in it. If your inner container is small and might flip over use a clothes pit to secure it to the edge of the pot.
This method also gives you the option of using different colors without using multiple pots. Wax can be difficult to clean off of pots and pans. Another benefit is that the water buffer will keep the wax from burning as it heats.
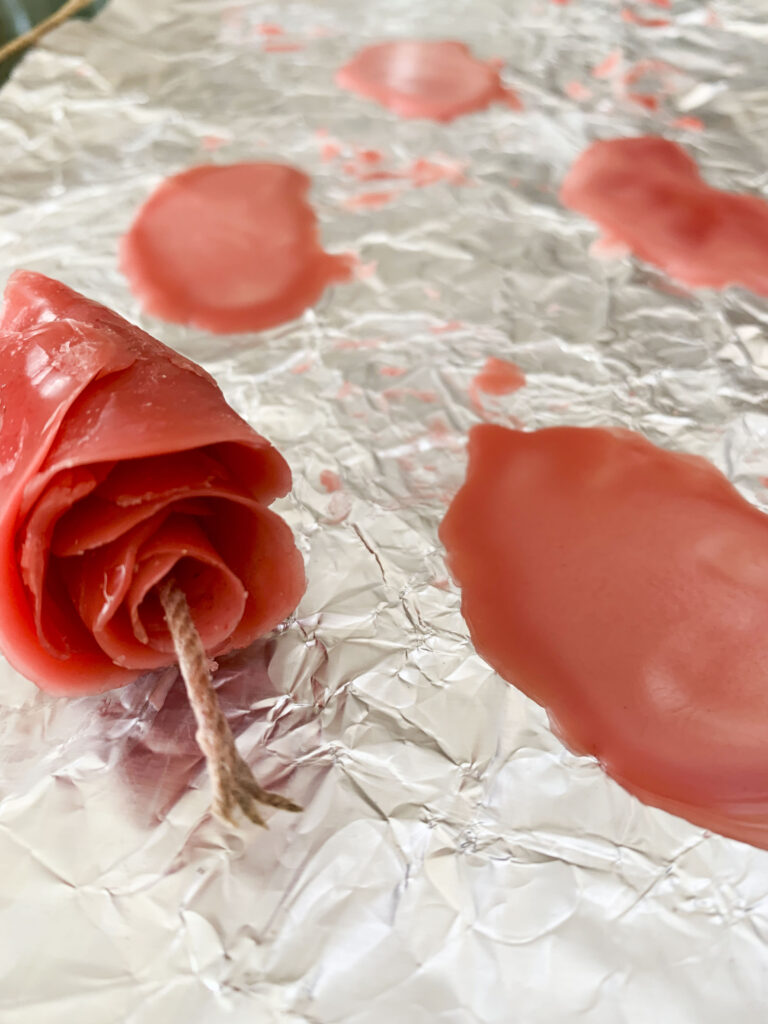
Use a spoon to scoop a bit of melted wax and pour it onto the aluminum foil. Try to pour it into a bean shape, about two inches across. The shape does not need to be exact, but you do want one edge with a nice convex curve.
When the wax is cool enough to not look milky, but not so cold that it is totally stiff, pull it off the foil and being to mold it. There is a narrow window of working time, so pour only two or three petals at a time.
Roll the first petal around your wick (if you have a long wick leave it long and cut it after making the flower). Add more petals in a rose formation, covering where one petal ends with the next one you add.
After pulling the wax petal off the foil gently shape the edge to curl slightly out, and curve the bottom slightly so it will easily wrap around the flower you are creating. If a wax petal cools too much to bond with the previous petals, dip the bottom third back into the melted wax, and then quickly smooth it onto the flower.
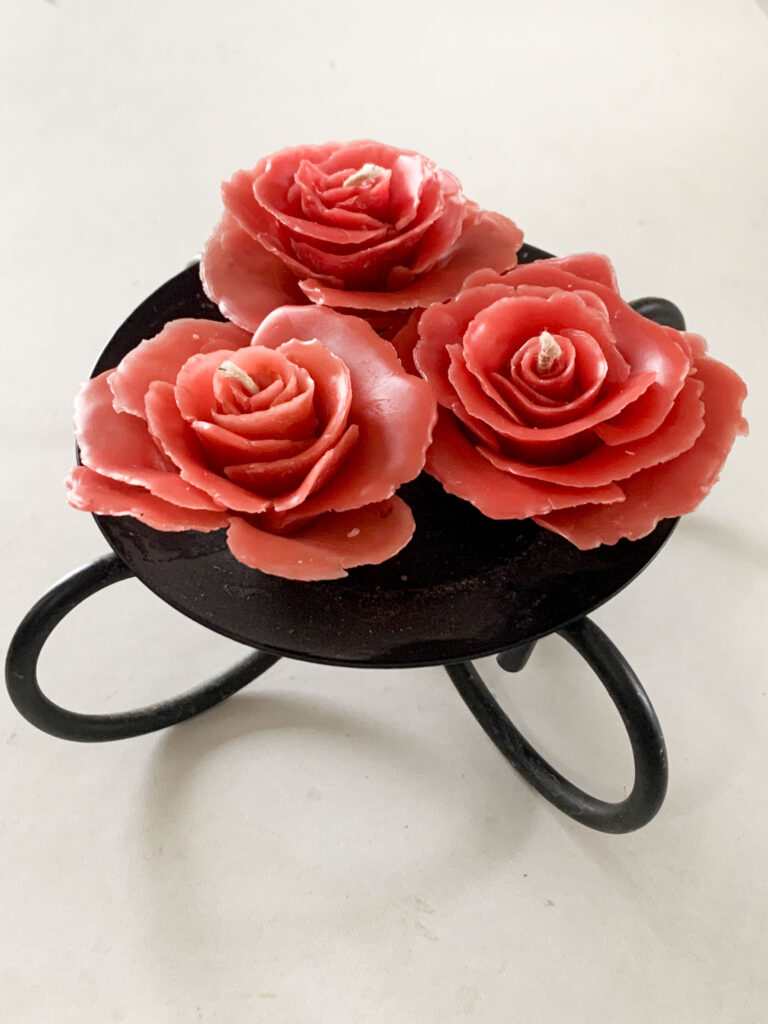
Continue adding petals until you are satisfied with the candle.
Cut the wick, and flip your candle over. If there is a hole in the bottom drip some wax in to fill it. Create a flat base by scooping some more wax into the spoon and dipping the bottom of the rose into it several times, letting it cool for a few seconds in between. After the last dip, set the candle firmly on the foil. Wait until it cools, then pull it off.
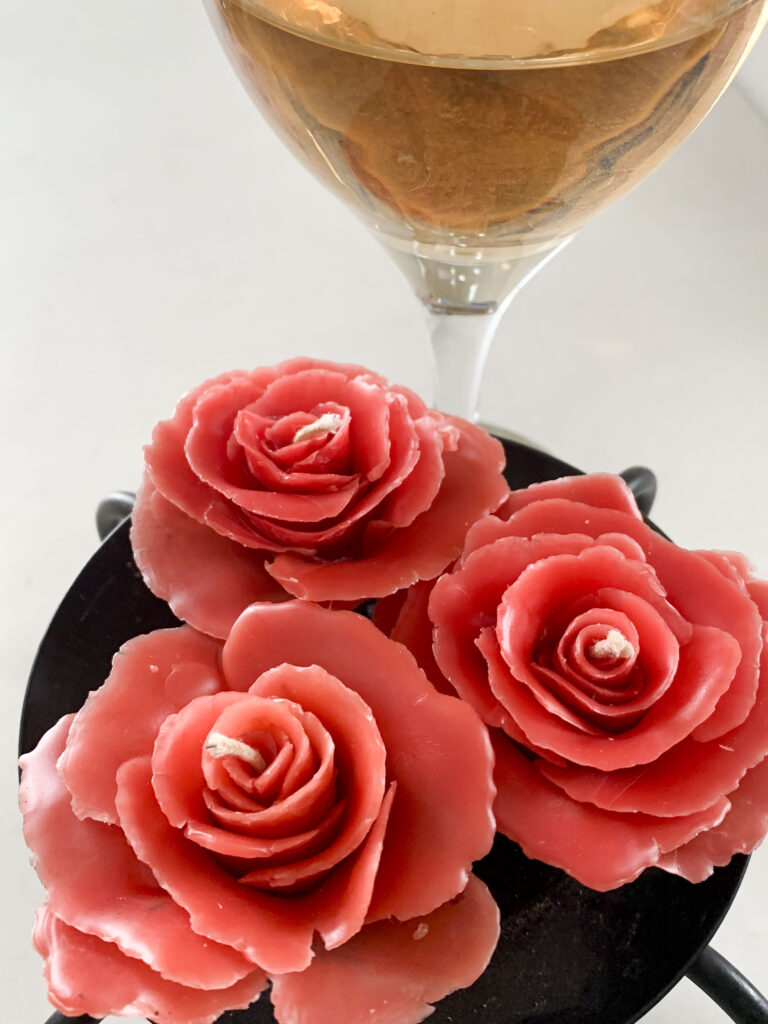
These candles make a sweet gift, a beautiful display on a table on candle holder or floating in a dish of water. Use them on Valentine’s Day (with your sweetheart or to pamper yourself), or keep them as gifts for other occasions.