BY ALDONA BIRD
Newsroom@DominionPost.com
While the time for spring cleaning has passed, it’s never too late to organize and beautify storage spaces. If you want to update your closet look without spending much money, this do-it-yourself project might be just the ticket.
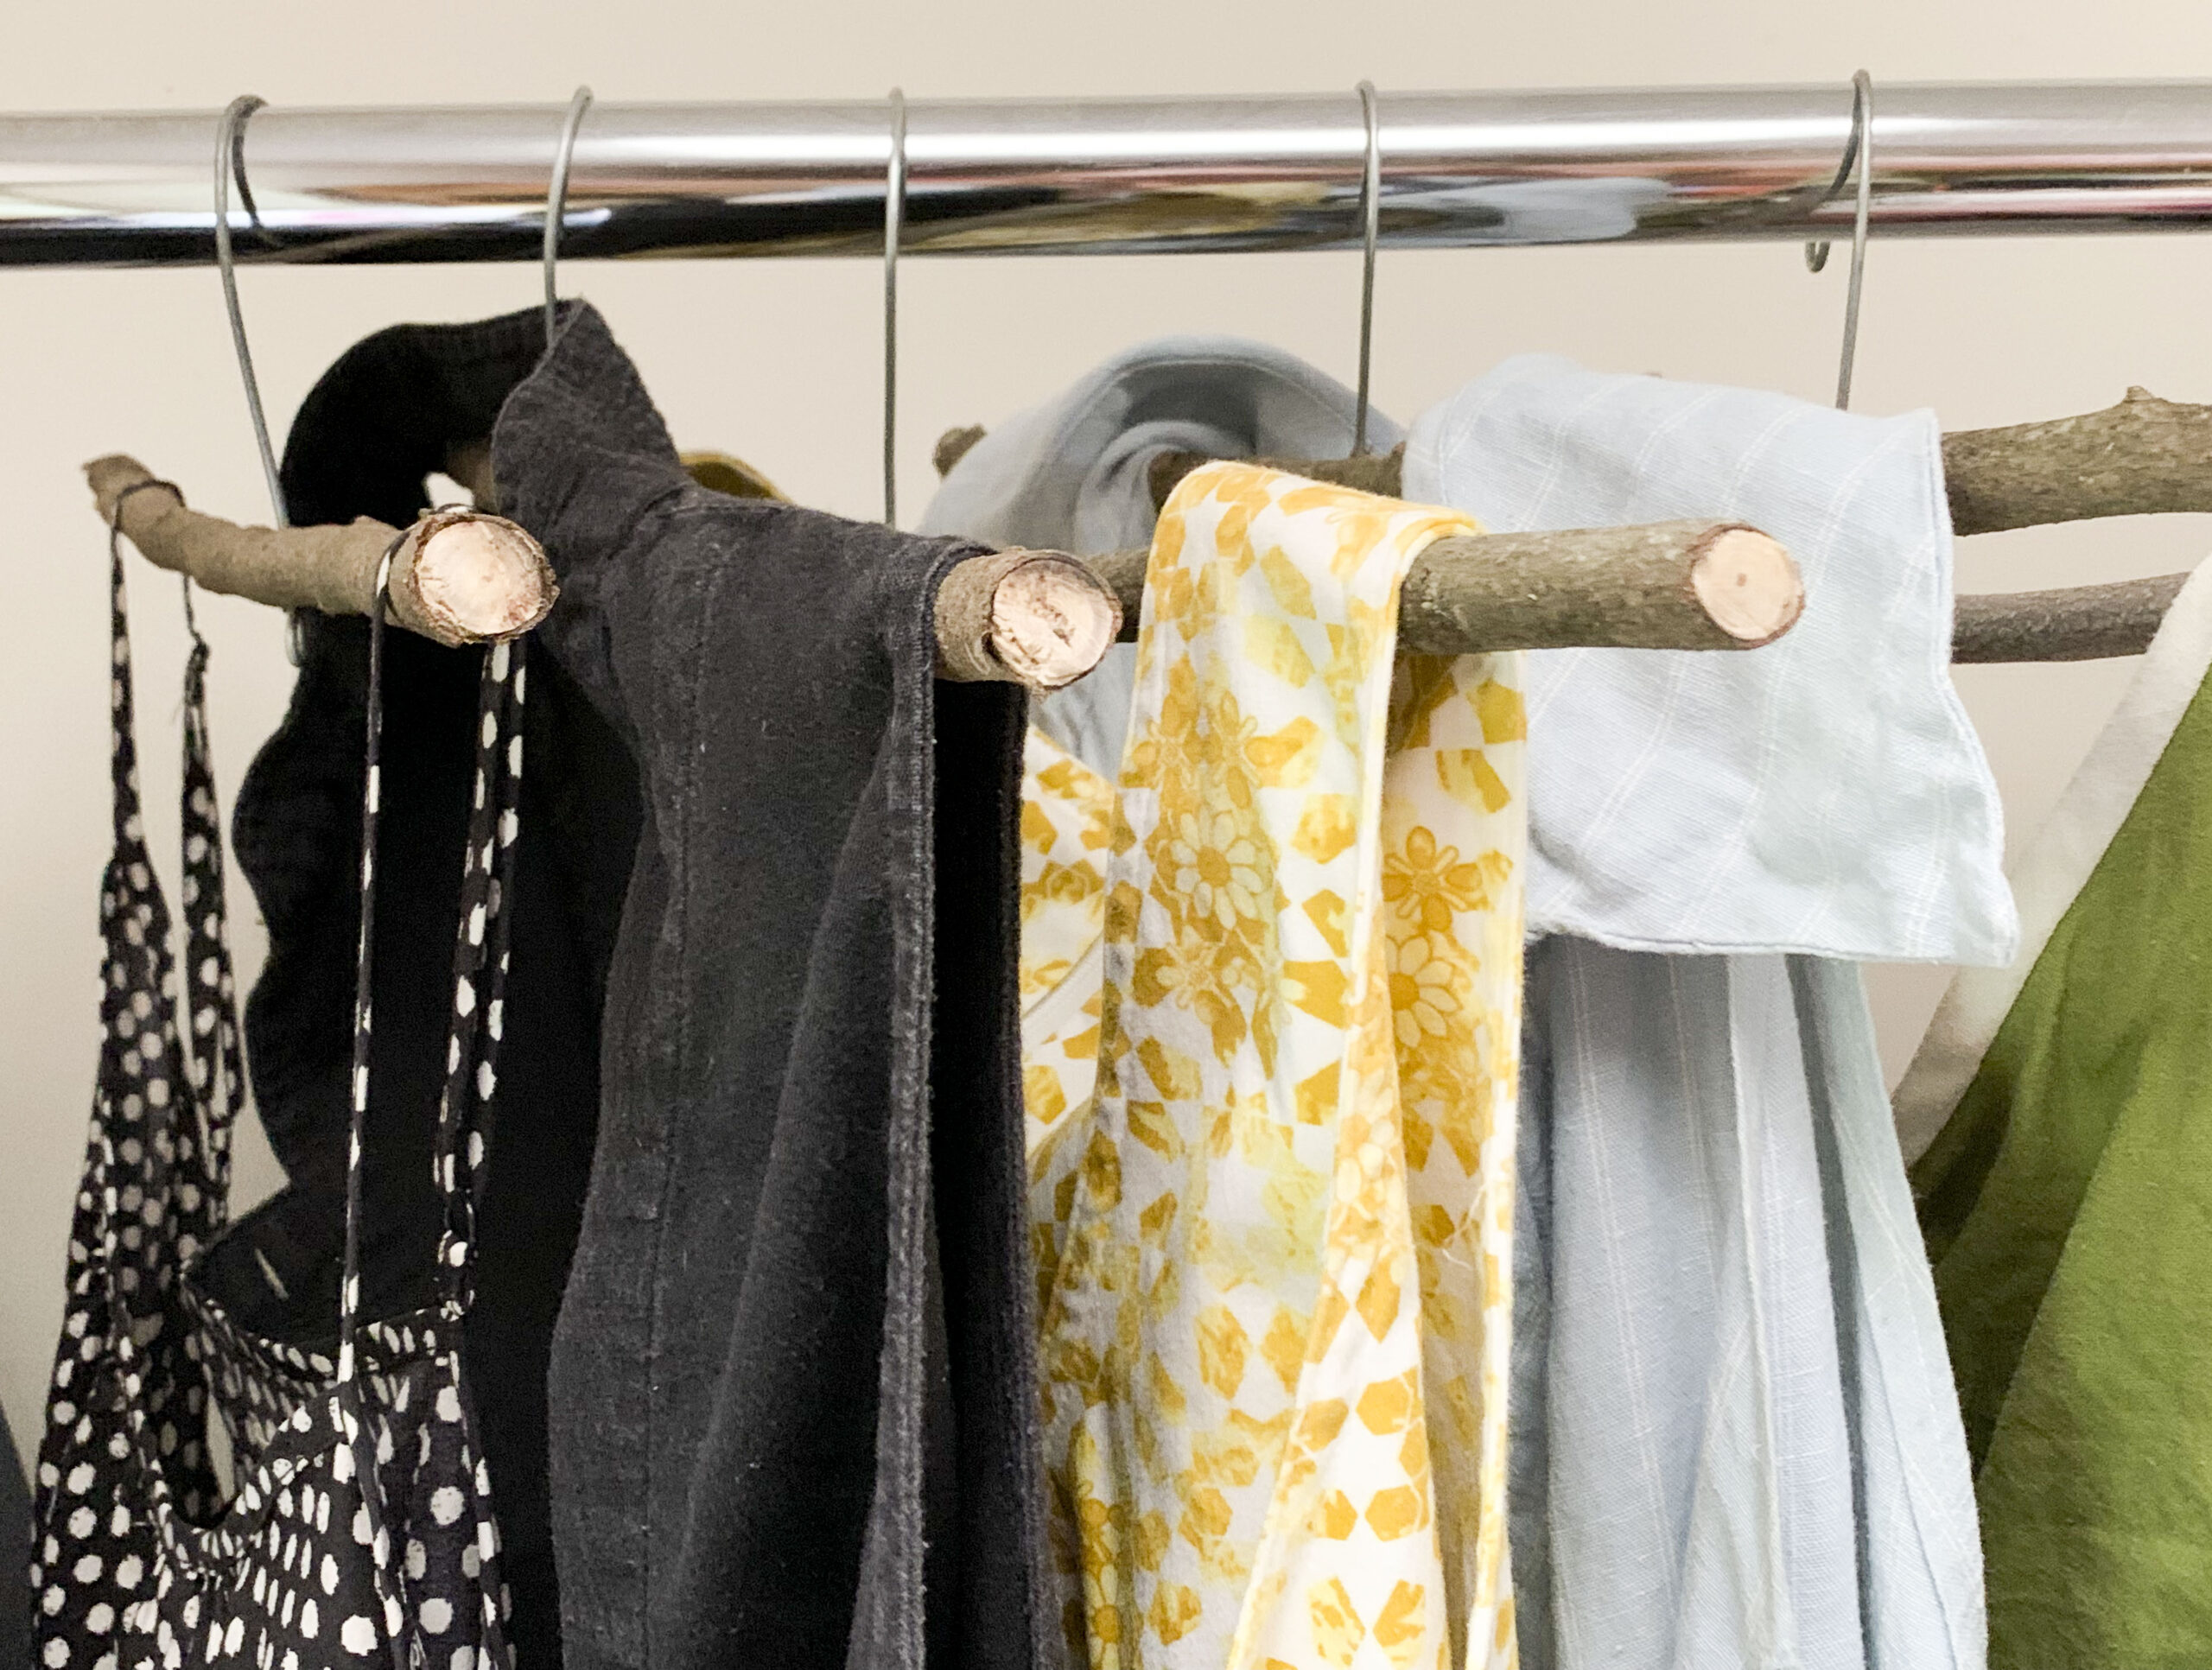
While clothes hangers keep your clothing from getting wrinkly, they also can add to the aesthetic of your closet and home. Making your own will give a unique, inexpensive and eco-friendly spin to home organizing.
To make your own clothing hangers you’ll need:
- Branches
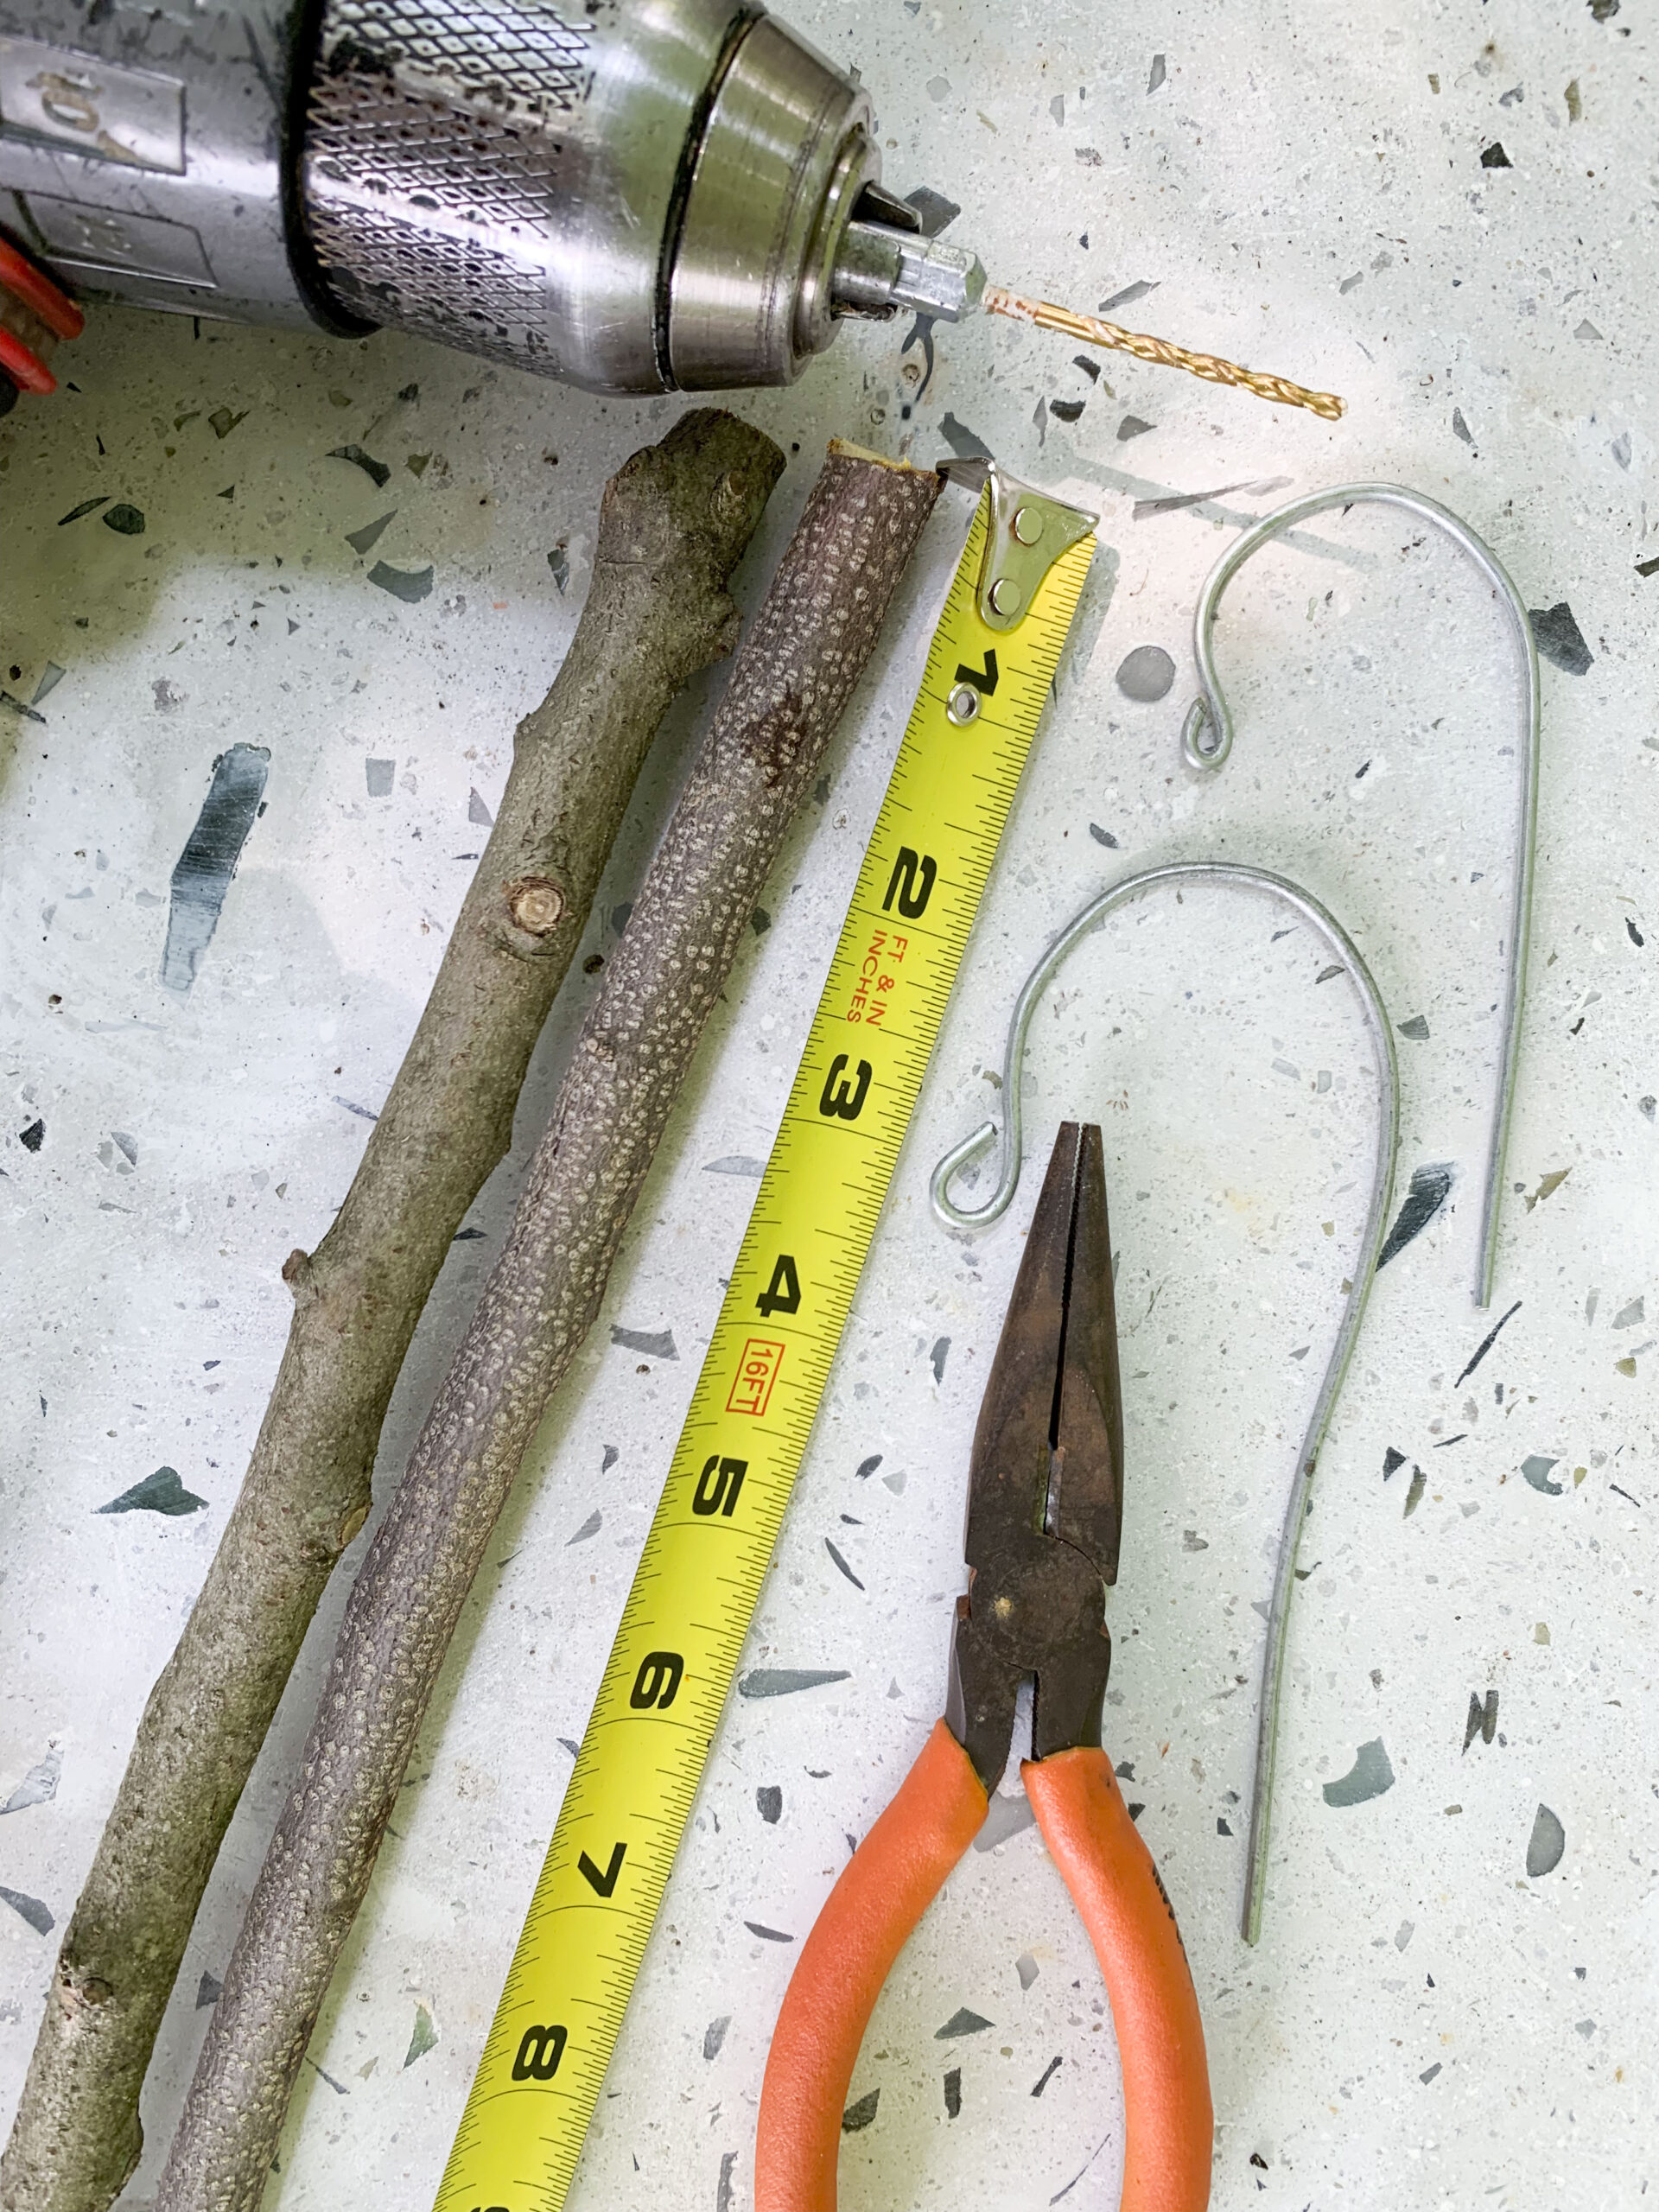
- Pruners or lopping shears
- Wire
- Pliers and wire cutters
- Tape measure
- Drill and bit
Select your branches — dried wood (make sure it is not rotten) is ideal, but green wood can also work. Pick fairly straight branches which do not have too many smaller branches. Ideal diameters are between half an inch and three quarters of an inch. Larger branches can work as well, provided they are not too heavy and cumbersome.
Cut off and smooth out any small branches from your main piece. Cut branches to 16-18 inches in length. If the ends are rough, whittle or sand them down so they won’t snag your clothing.
Measure the length of the branch, and mark a point at the middle.
Select your wire — 12 gauge galvanized works well, as it holds its shape and doesn’t stretch out when supporting the weight of clothing. Other gauges may work as well; if you have another size on hand, give it a try.
Pick a drill bit the same size as your wire. Drill a hole all the way through at the halfway point you marked.
Bend the last quarter inch of one end of the wire to make a small loop — this will keep your hangers from having sharp edges which may snag clothing.
Bend the top three to four inches to create a hook to fit over your closet rod. You can freehand this arch or use a hanger you already have as a template.
If you have broken plastic hangers with metal hooks you can upcycle those instead, using a drill bit slightly smaller than the hook’s metal threads.
Insert the wire or hook through the hole you drilled in the branch. If using wire, bend the bottom quarter inch back as you did the top, to keep the wire from slipping back out.
Bend and adjust the hook as needed so the hanger will hang straight. These hangers are best for sleeveless garments. If you want to hang sleeved clothing, look for branches with a shoulder like curve, and be extra careful to smooth the ends out.
You can also add extra customization by painting the hangers — color the whole branch, add a pattern or paint just the ends. Alternatively you could carve designs or a pattern into the bark.
Put your clothing on the hangers, and enjoy the new look of your closet!
TWEET @DominionPostWV
