By ALDONA BIRD
Newsroom@DominionPost.com
If you’ve started seeds indoors or are ready to direct sow early flowers and vegetables, you may be considering how to protect them from pests or give them a boost of warmth to extend the growing season a little.
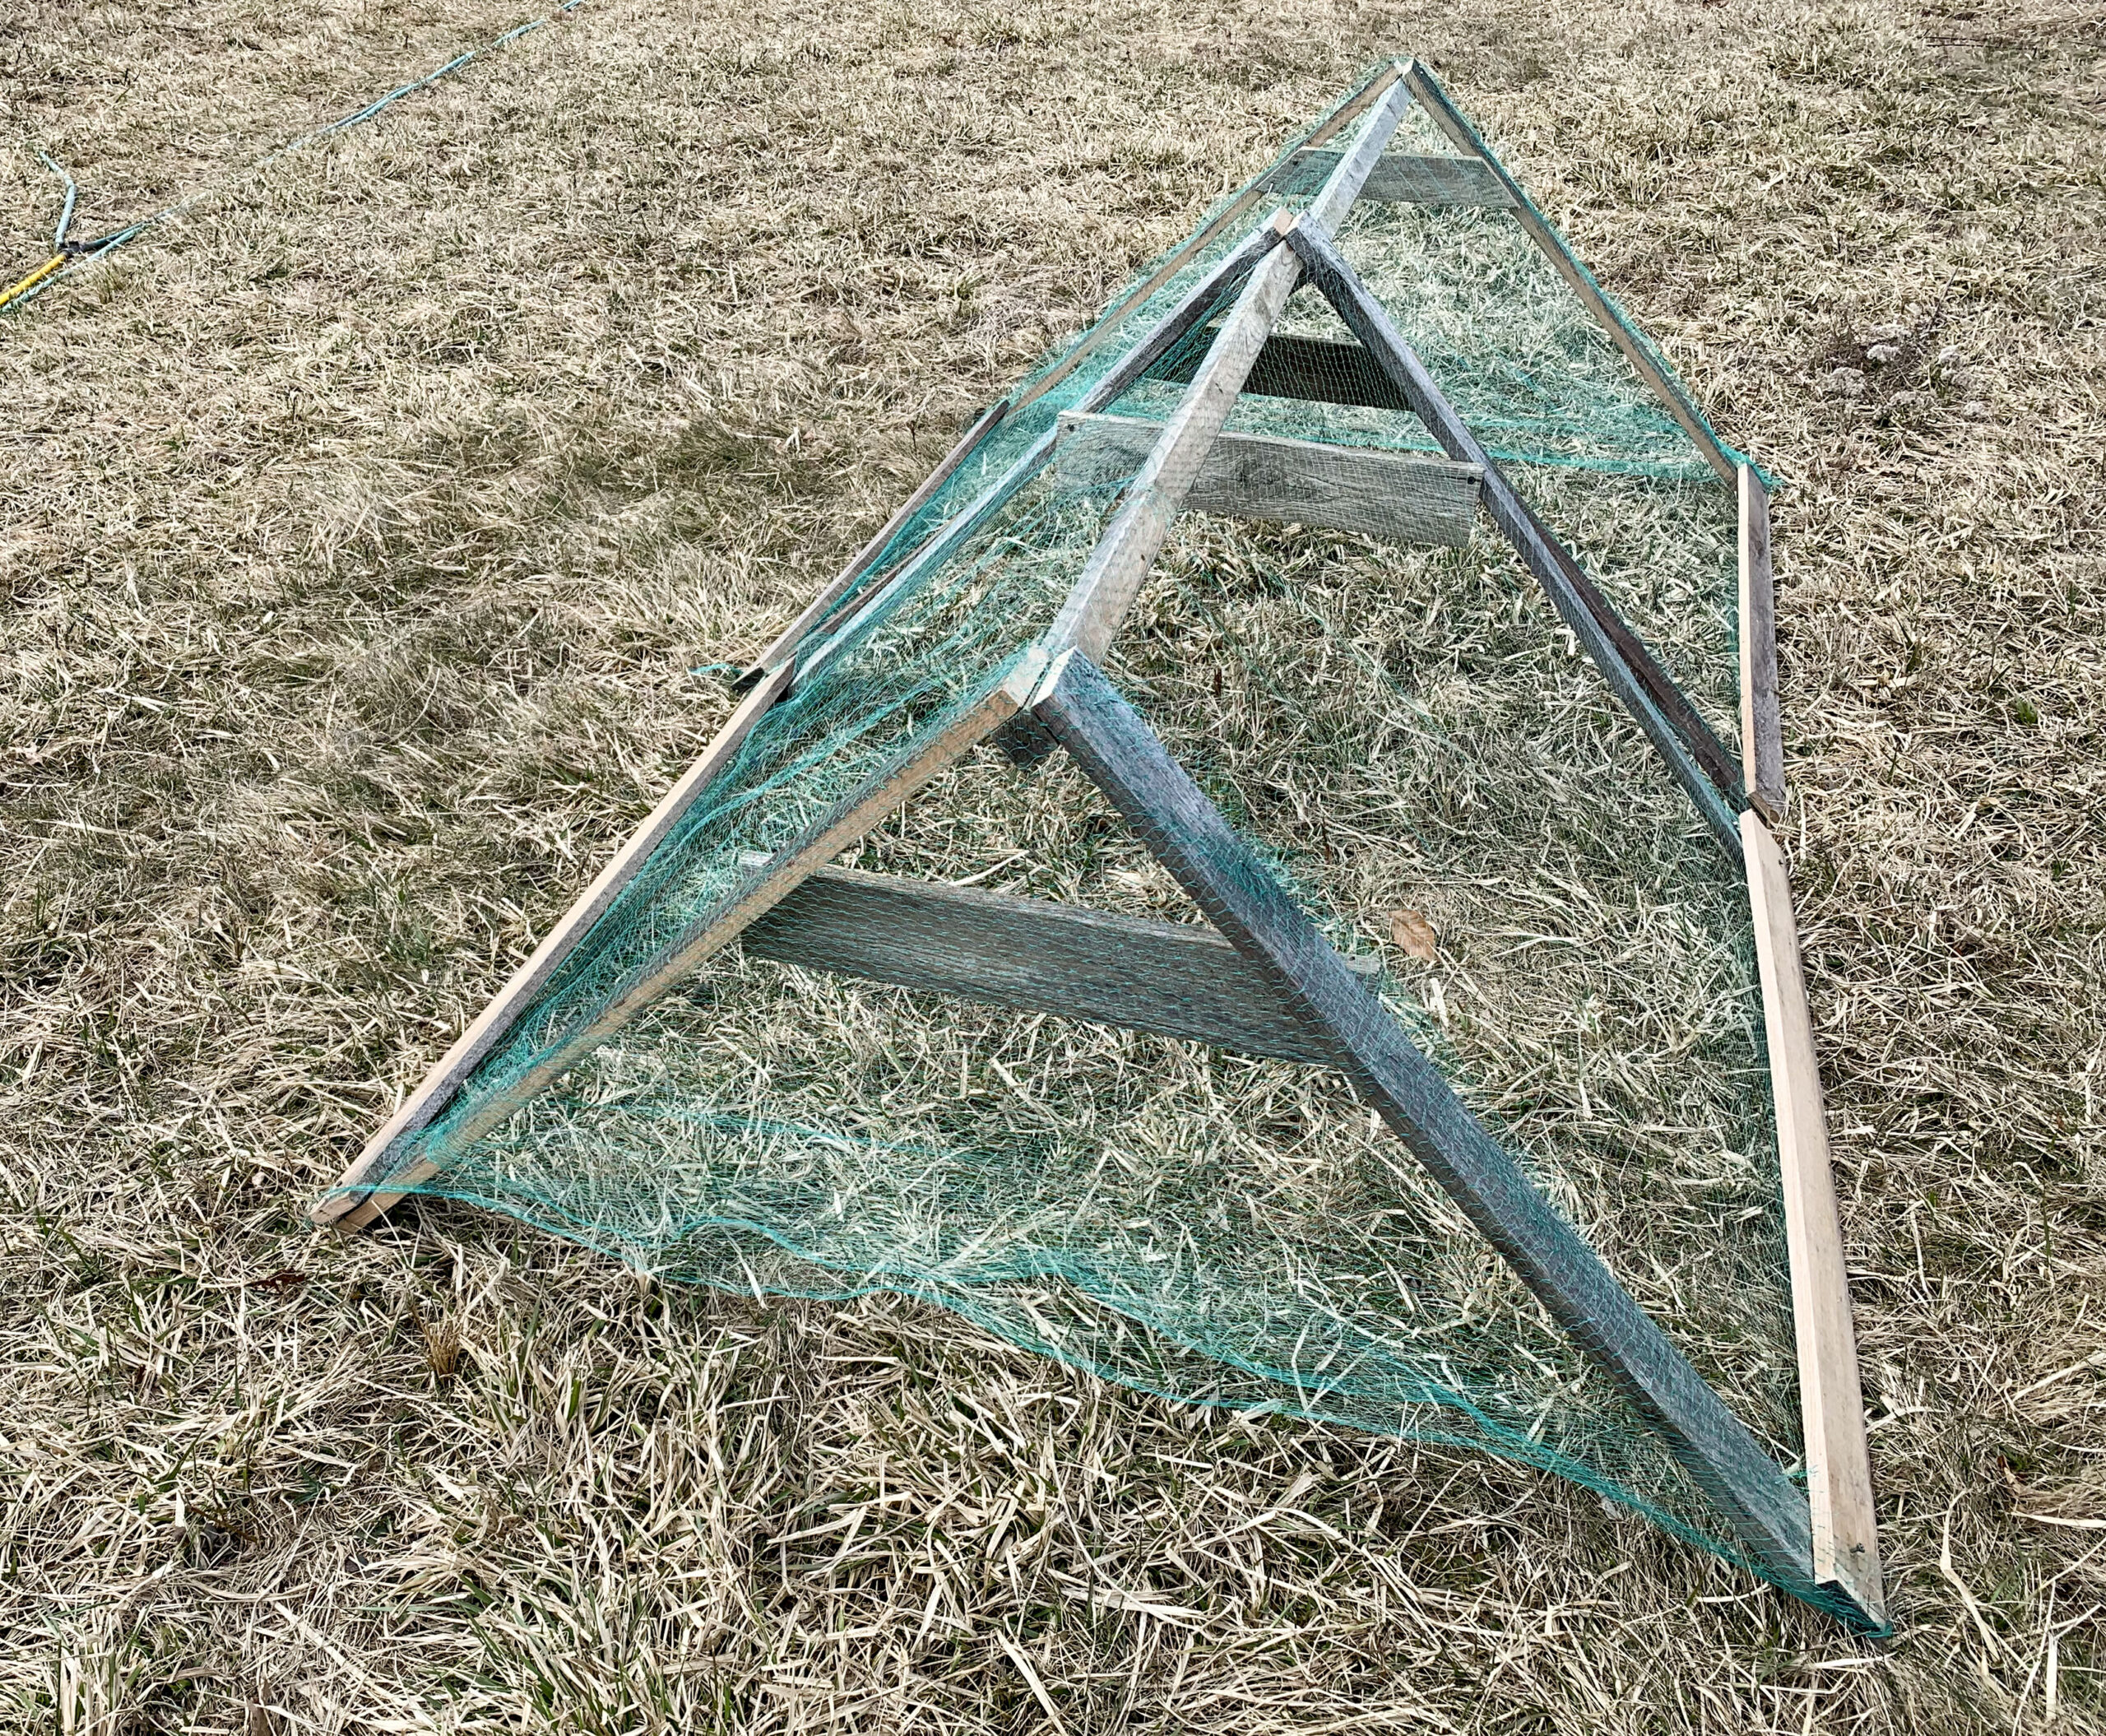
With DIY wooden triangle frames, you can protect your plants with row cover cloth, bird netting or cover with plastic to trap heat and boost growth.
To build these frames, you will need:
- Four feet of 2-by-2-inch wood board
- Eight feet of 1-by-4 or 1-by-3-inch wood board (cut into two four-foot sections)
- 12 feet of 1-by-3-inch wood board (cut into four three foot sections)
- Two to three feet of 1-by-3-inch wood board (cut in half)
- Screws (1 3/4 length is ideal) and drill
- Circular saw
- Bird netting, row cover or plastic (appropriate for a greenhouse)
- Construction stapler and staples
The following measurements are for a triangular frame that is four feet long and about five feet wide. You can adjust the measurements to suit your garden.
If you plan to move the frames to weed, plant or harvest, don’t exceed four feet in length because they will become too cumbersome to conveniently move.
Instead, make multiple frames and line them up to cover your beds or rows. Shorter sections will be lighter and easier to remove for access to the plants inside.
When choosing your wood, consider how it will weather. If using untreated wood, oak or other rot-resistant wood may be best. Eco-friendly, water-based wood treatments are also a good option. Consider the screws you use as well: Stainless steel will hold up best outdoors, but Teflon-coated may also be used.


To assemble the triangle frame, first cut your boards to the above listed lengths (if you buy your wood from a construction supply store, they may be able to cut the lengths for you).
The 2-by-2-inch board will run along the top of the frame, the three-foot 1-by-3 boards will be the sides, and the four-foot 1-by-3 or 1-by-4 will make the bottom edges.
Lay the 2-by-2 on the ground or work surface, and attach a side piece to one side, perpendicularly, on either end. Lift the pieces up and stand the structure on the ends of the 1-by-3 legs. Hold it at an angle, and attach two more legs to the other top side of the 2-by-4 board, creating a triangle with the legs on either end.
Next, use the two 12-18 inch 1-by-3 boards as cross braces to make the frame more sturdy. Don’t leave off these pieces as without them there is too much pressure on the 2-by-4 when the frame is moved. Either cut each end of these boards at a 45-degree angle such that one end side is narrower and the other longer or use a full rectangle.
Attach these to the inside of the legs on either side with screws.
To complete the frame, add the four-foot boards (1-by-3 or 1-by-4 work well) along the bottom, leaving a gap of an inch or two to allow for uneven ground and snakes to pass through (especially important if you are covering the frame with bird netting).
Cover the frame with your chosen material. Bird netting works well secured on to one end of the frame with staples before the bottom board is attached. Attach the bottom board to sandwich the netting and secure it tightly.
Attach the same material to the ends of the frames (or if you plan to use multiple frames lined up just close off one side of each of two frames).
Bird netting as a cover may be effective at protecting small or low-growing plants from birds, deer, bunnies and other such pests. Row cover fabric may help protect against insects. Plastic will make these into portable cold frames.
Tweet @DominionPostWV
