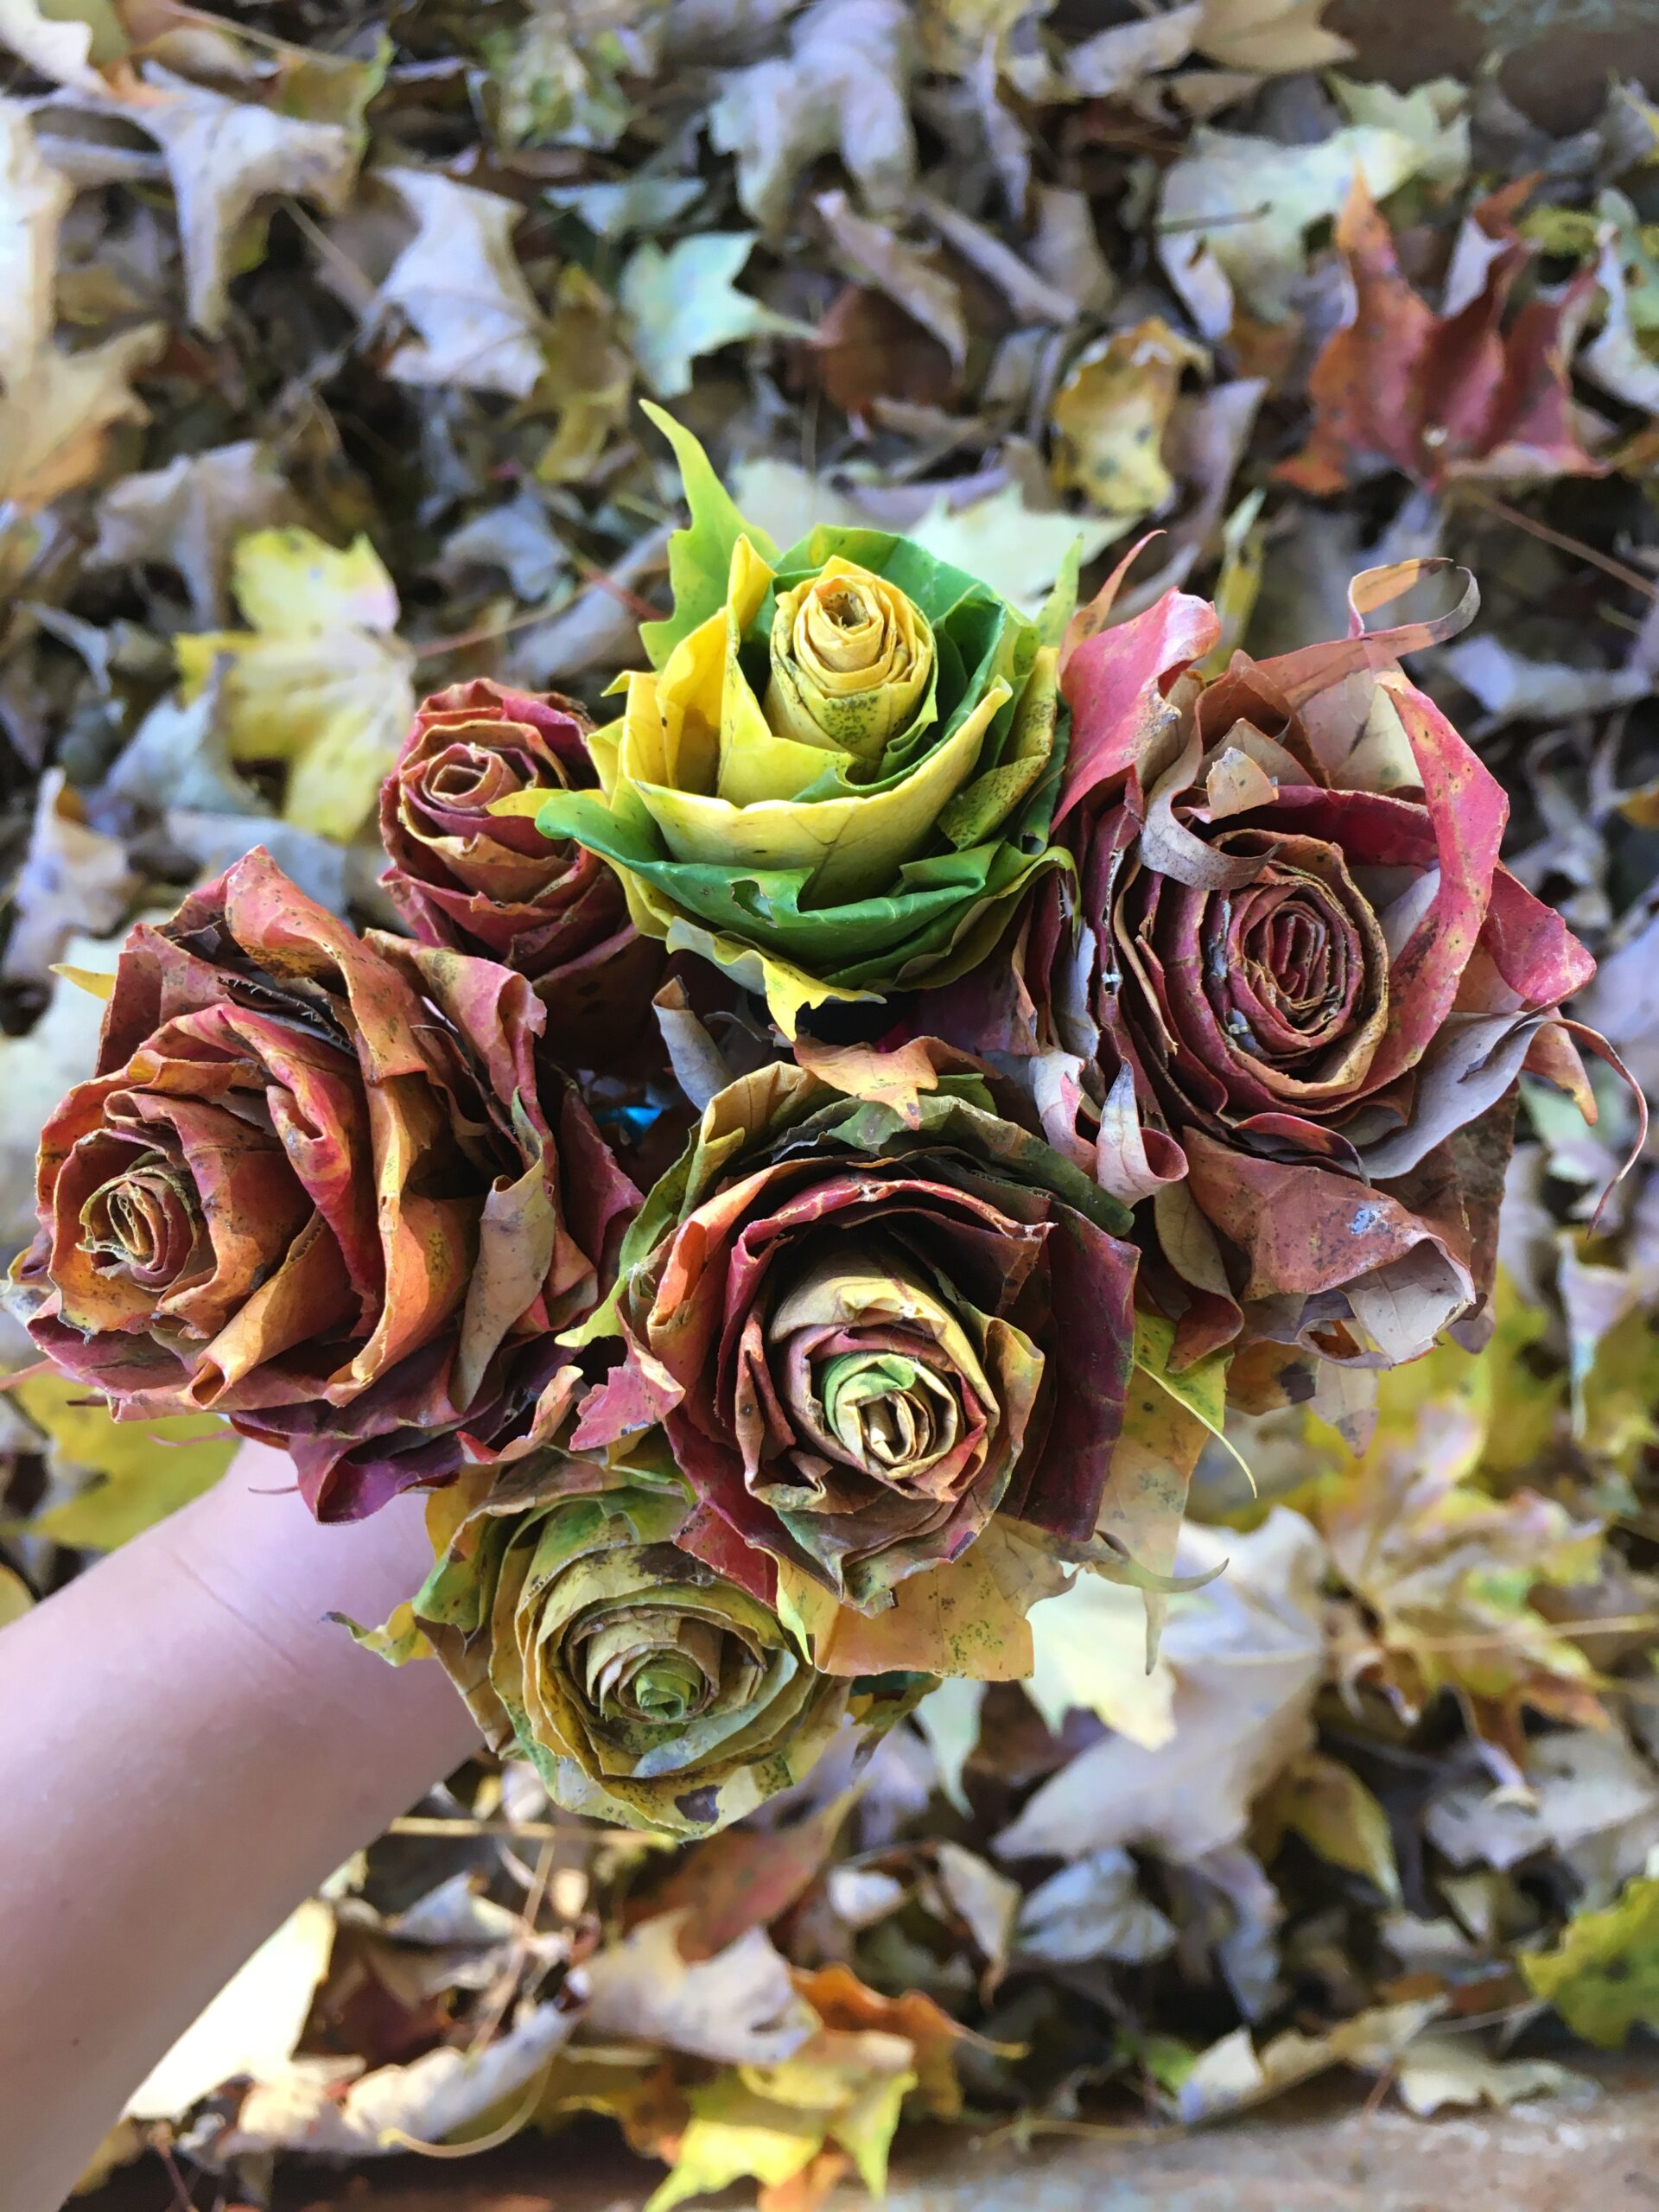
Make your own bouquet to spruce up tables, homes and bring the scent of fall indoors
The season of fresh cut flower bouquets is nearing an end. But that’s no reason not to have vases of roses around your house — if you make them yourself out of fallen autumn leaves.
With a few materials you probably already have on hand, you can bring the scent of fall inside and set up a great shot for Instagram (since we can’t impress friends with our home décor in person these days).

Materials you need for DIY Autumn Leaf Roses:
- Fallen leaves, supple, not dried and crumbly
- Floral tape or rubber bands and ribbon
- Twigs
As you collect leaves, consider the color palette for your roses. Let the colors of nature inspire you, and choose one hue, a gradient or a wide variety of whatever pattern catches your whim.
Any leaf soft enough to gently fold without cracking in half works. The leaves used to make the roses in these photos are maple, but you can use others as well. Larger leaves will be more difficult to achieve the petal look with.
If you use maple leaves, you will need 10-20 leaves for each rose. Ten leaves make a smaller rose, and between 10-20 are enough to make a full rose.
Once you have leaves in your color palette of choice, gather some sticks. You’ll use these as stems for the roses, so chose them in roughly the length you’d like your flowers to be and pick up as many as blooms you plan to make.
Also grab stretchy and clingy floral tape, or if you don’t have any on hand, grab some rubber bands and ribbon.
Sort your leaves by size. Using the largest first, fold the top half down so you have a continuous piece along the fold. Roll the folded leave up. If using floral tape, wrap a small bit around the base to hold the spiral.
Fold another leaf, and wrap it around the first. Once you have a center you like, change your folding method; fold the top point of your maple leaf down, then fold each of the other two points in and down, so the folded top point is highest.
When you wrap this type of leaf onto your rose center (folded side in), it will look like a petal. Repeat this fold, and add each leaf overlapping another.
Adding small leaves on the very outside can be a nice finishing touch. If using floral tape, secure leaves as needed and wrap snuggly when your flower is finished. Use floral tape to secure tightly a twig or stick as a stem. You can cover the whole stick in tape, or stop when it is attached to the leaf rose.
If you don’t have floral tape, use a rubber band to secure all the leaves together when the whole constructed blossom is done. Tuck the stick into the rubber band, and add another to secure the stems of the leaves to the stick if needed.
Wrap a ribbon around the stick, starting at the top by the leaves, as far down as you find aesthetically pleasing. Tie, tuck or glue the ribbon to secure it.
Fill a vase, and place on an end table or use these blooms as a center piece. They smell like the fall leaves they are, which is an added perk to this pretty craft.
ALDONA BIRD is a journalist, exploring possibilities of local productivity and sustainable living in Preston County.

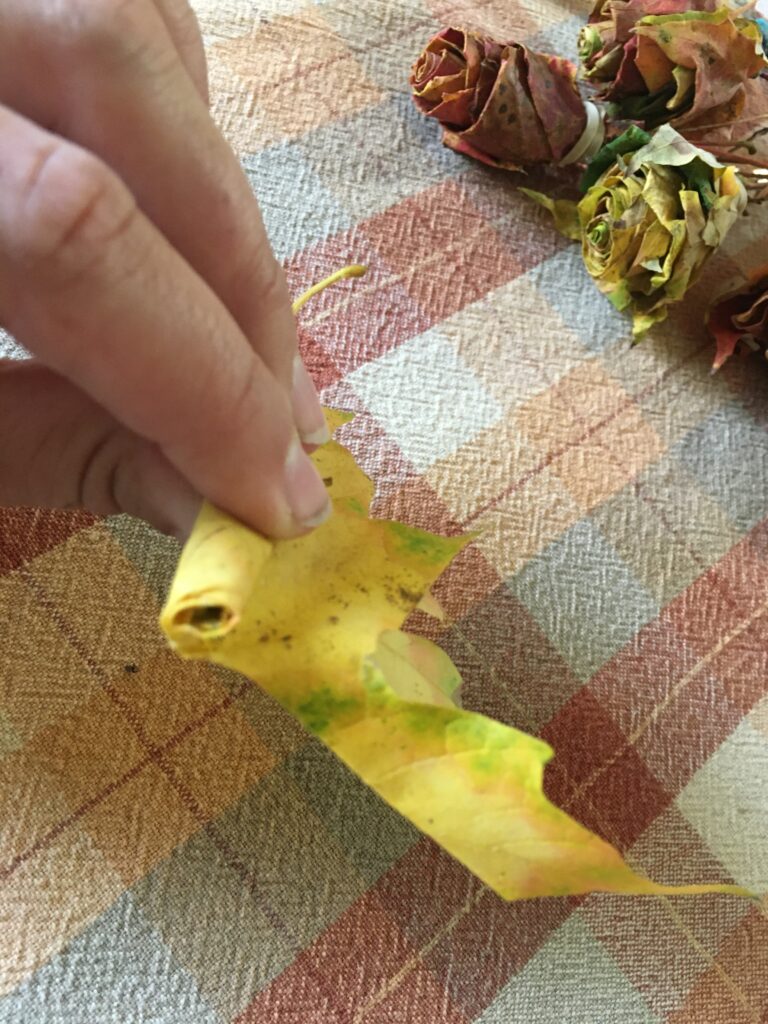


Top row, left to right: Using the largest leaf first, fold the top half down so you have a continuous piece along the fold. Roll the folded leave up. If using floral tape, wrap a small bit around the base to hold the spiral.
Second row, left to right: Fold another leaf, and wrap it around the first. Once you have a center you like, change your folding method; fold the top point of your maple leaf down, then fold each of the other two points in and down, so the folded top point is highest. When you wrap this type of leaf onto your rose center (folded side in), it will look like a petal. Repeat this fold, and add each leaf overlapping another. Use floral tape to secure tightly a twig or stick as a stem. You can cover the whole stick in tape, or stop when it is attached to the leaf rose.
Bottom row: If you don’t have floral tape, use a rubber band to secure all the leaves together when the whole constructed blossom is done. Tuck the stick into the rubber band, and add another to secure the stems of the leaves to the stick if needed.
