DIY: Building window boxes for flowers is a fun activity for all ages
By Aldona Bird Newsroom@DominionPost.com
Many of us are still mentally and emotionally stuck in May. Surprised to see late summer flowers blooming already, when the global pandemic slowed our lives down — bringing some things to a standstill — we must face that the seasons progress on the usual schedule.
Even though it’s almost autumn, plenty of time remains to enjoy flowers, indoors and out. A great way to easily enjoy both at once is with a window box. Building one yourself can be an inexpensive and fun project.
If you have children, you can use building window flower boxes as a way to teach them some basic carpentry skills, or you can use it as way to spend some productive alone time.
To make a window box, you will need:
- Wood: Cedar, oak and locust are good options, as they hold up to weather well; pine and others that rot quickly won’t last as long
- Saw: circular, miter or even a handsaw will do the trick
- Drill
- Drill bits
- Screws
- Wood glue (optional)
- Tape measure
- Level
- Paint or varnish
- Brackets and appropriate mounting bolts
First, determine the size you want your box to be. Measure the window it will hang under. Don’t forget, a window box can also look great sitting on a window sill, railing, along the edge of a patio or anywhere else you want a space to grow some plants.
The easiest way to decide on the height of the box is to go with the height of the boards you’re using for this project. If buying new lumber, one inch by eight inch is ideal.
If you upcycle boards from other projects, you might need to plane or sand the wood before starting. If the wood is pretty rough, use a table or bench-top planer, and work one side until it is smooth and pretty. Especially if you’re not planning to paint, use a hand planer to fix up the edges.
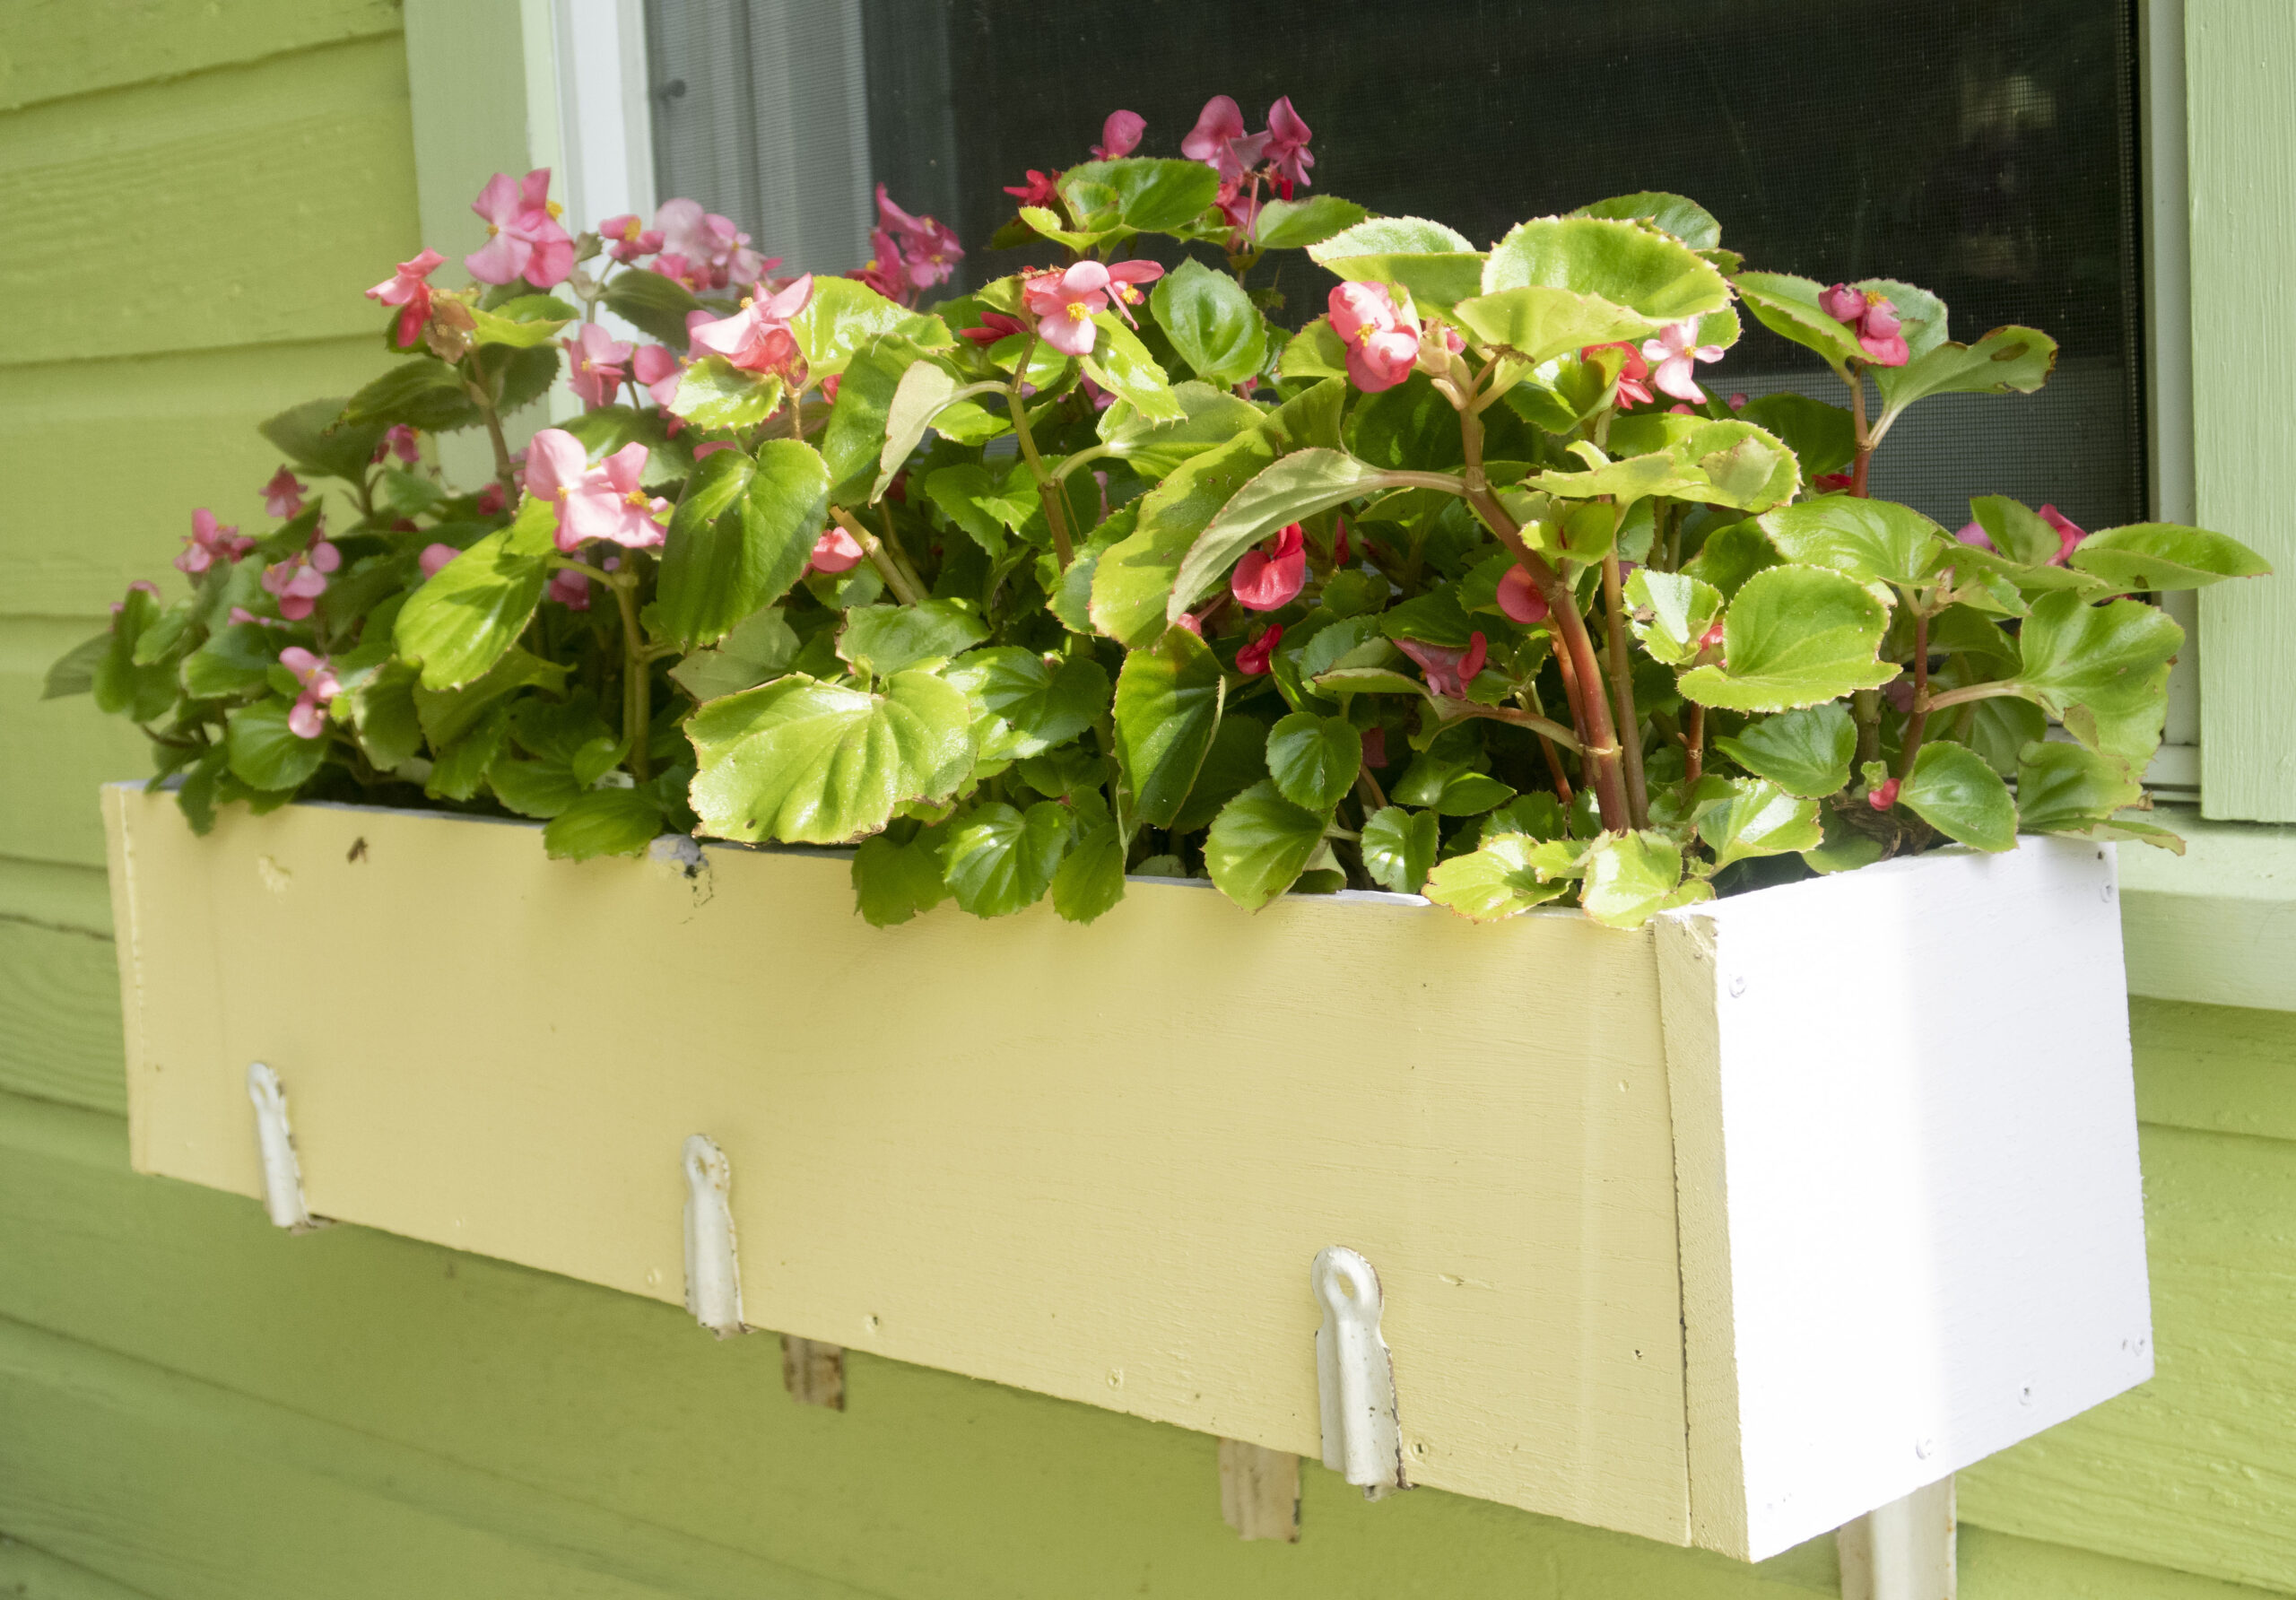
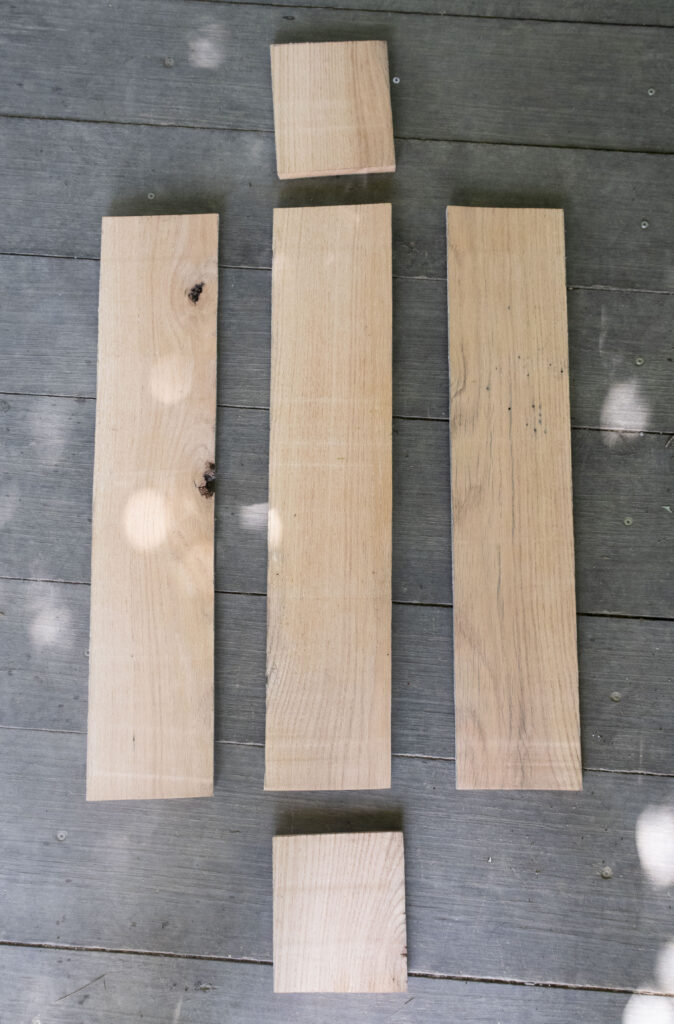
Cut three boards to the length you want the box to be — standard windows are 28 inches, which is the size of the example box in these photos. These will be the sides and bottom of your box.
Cut two end pieces — if using a one-by-eight-inch board cut the ends eight and three quarters. The actual size of a one-by-eight-inch board is three quarters of an inch by seven and a quarter, so the end pieces will be the same height as the sides, and cover the ends like a cap.
Line your boards up for a dry fit, and determine where you will place the screws. Using a drill bit slightly smaller than your screws, pre-drill a hole in the center edge of your side boards, and into the edge of the bottom board in the exact same spot.
If using wood glue, apply now.
Screw together via this pre-drilled hole, then pre-drill more spots for screws through both the side board and bottom at once. Add screws to secure. Repeat for the other side board, then for the end caps.
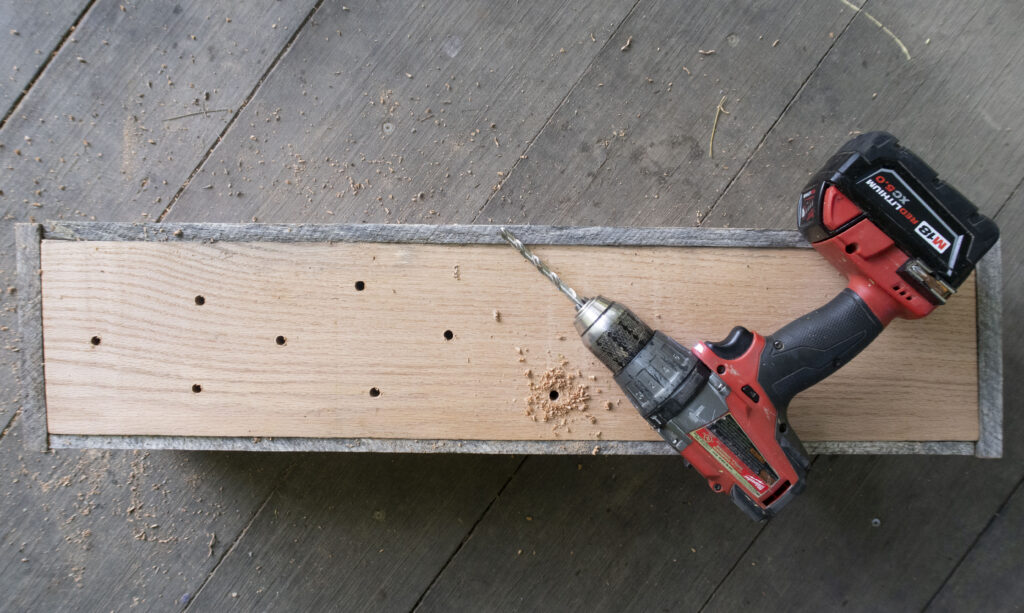
Once you secure all the sides, turn your box over to rest on the open top. Using a large drill bit, create drainage holes, so water will not puddle and rot the wood.
If keeping the box indoors, or somewhere where water dripping will be problematic, don’t drill the holes, and instead line the box with plastic or another barrier. You can also set potted plants right into the box.
Paint or varnish your box, to keep the wood from showing weather wear, and to match the style of your home.
Before planting, add a layer of rocks to aid drainage. Add soil and flowers — begonias are a great option for pretty foliage and bloom if you have a shaded window or spot for your box. For a sunny spot, options abound.
Mount the box under your window with brackets and appropriate bolts — these will differ based on whether your exterior wall is wood, brick or another material. Two or three brackets should be ample, depending on the length of the box.
The true beauty of this simple box is how customizable it is.
Add trim along the top, frame it with two by two inch boards, add dog-eared fence tops along the outside, or make any other personalized touches so it will be unique and just to your taste, and spark a little joy every time you look at your home or out your window.
Tweet @DominionPostWV
