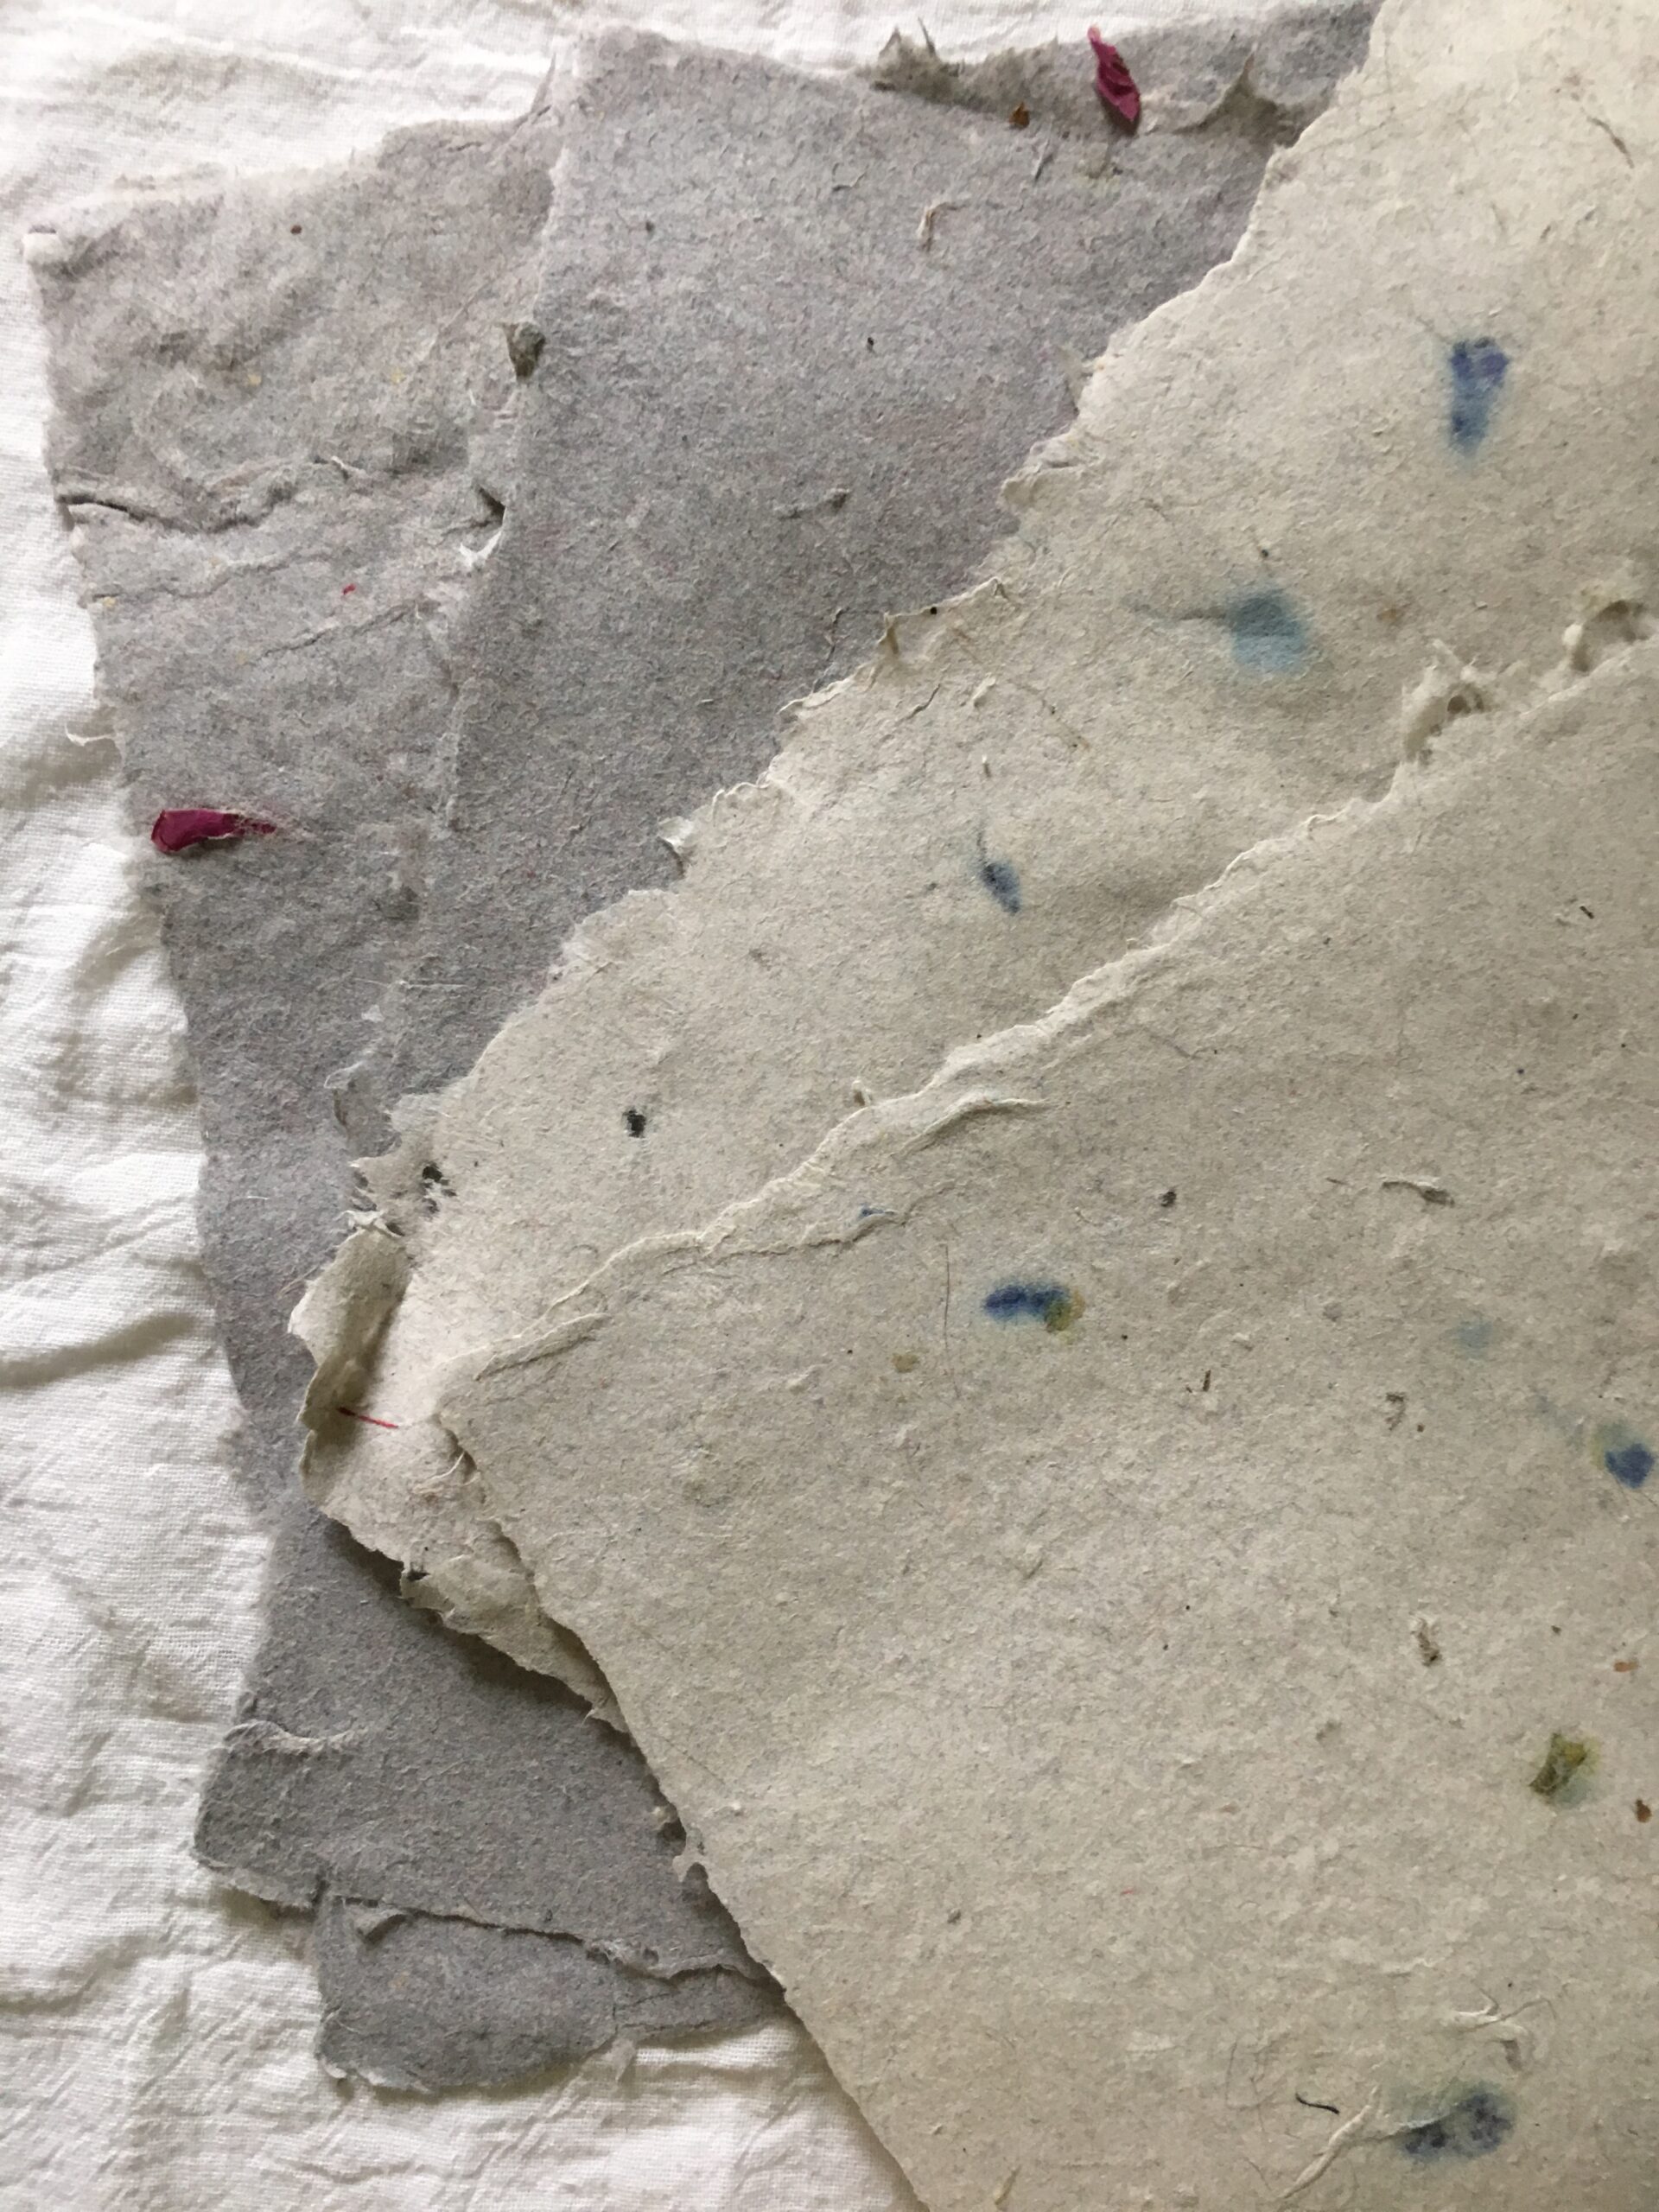
This craft gives a personal touch to cards, gift boxes, notes and scrapbook pages
By ALDONA BIRD
Newsroom@DominionPost.com
If you’re still observing the Safer at Home order, you might be going a little stir crazy by now. Crafting and releasing creativity can be a great way to break the monotony.
Shopping online for craft supplies is great, but not as fun as seeing and touching them, plus there is the environmental impact of shipping to worry about. To get the optimal creative experience during a pandemic, use supplies you already have on hand.
Some crafting supplies might be masquerading as other things, such as dryer lint. With that simple supply you can make your own paper, and once it’s made you have the wide world of paper crafts ahead of you.
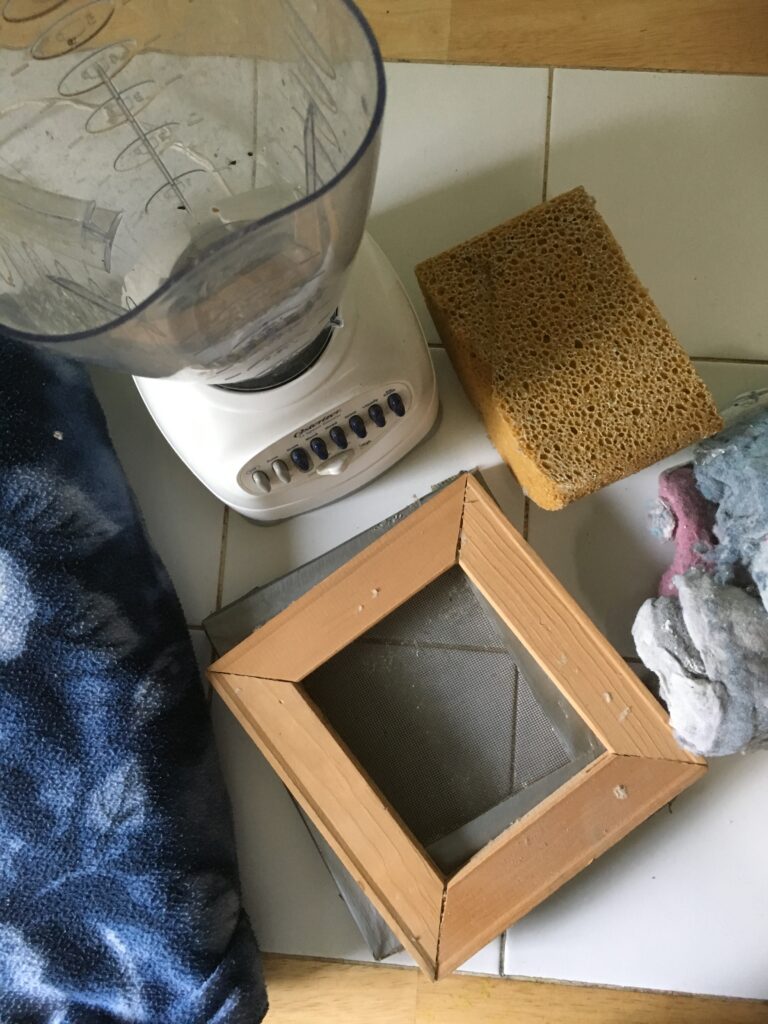
To make paper, you will need:
- a square or rectangular basin, larger than the sheets of paper you want to make
- a blender
- mold and deckle (don’t worry, DIY below)
- water
- towels or old absorbent clothing
- a sponge
- drier lint or paper, which would otherwise be recycled
First, make your mold and deckle. A paper mold is used to scoop the paper-to be, hold it while water dips out, and determine the largest size the sheet of paper can be. The deckle controls the edges of the paper.
To make your own mold and deckle, you will need:
- two wooden picture frames of the same size
- window screening
- wood staples or flat headed tacks and hammer
Remove the glass and backing from one of the frames. On the back (flat side) of one frame, secure the window screening to cover the whole frame — this will be your mold. You need to be able to hold the deckle flat to the mold, so rounded tacks which would create space between the mold and deckle will not work.
Staples are a great and easy way to secure the screen to the frame. Cut the screen down along the edges, so it is the same size or just smaller than the frame.
Remove the glass and backing of the other frame. This is your deckle.
To make paper:
Soak drier lint in water for at least 30 minutes — several hours is better. If using paper, shred first and then soak. After soaking, put the materials and water into the blender, and blend until it turns into pulp.
This is a great time to have a blender dedicated to crafts — you never know when you’ll have to blend a non-food substance in the name of creativity.
Pour pulp into your container (a plastic storage tub works well), adding extra water. The water should be deep enough that you can easily submerge your mold and deckle fully.
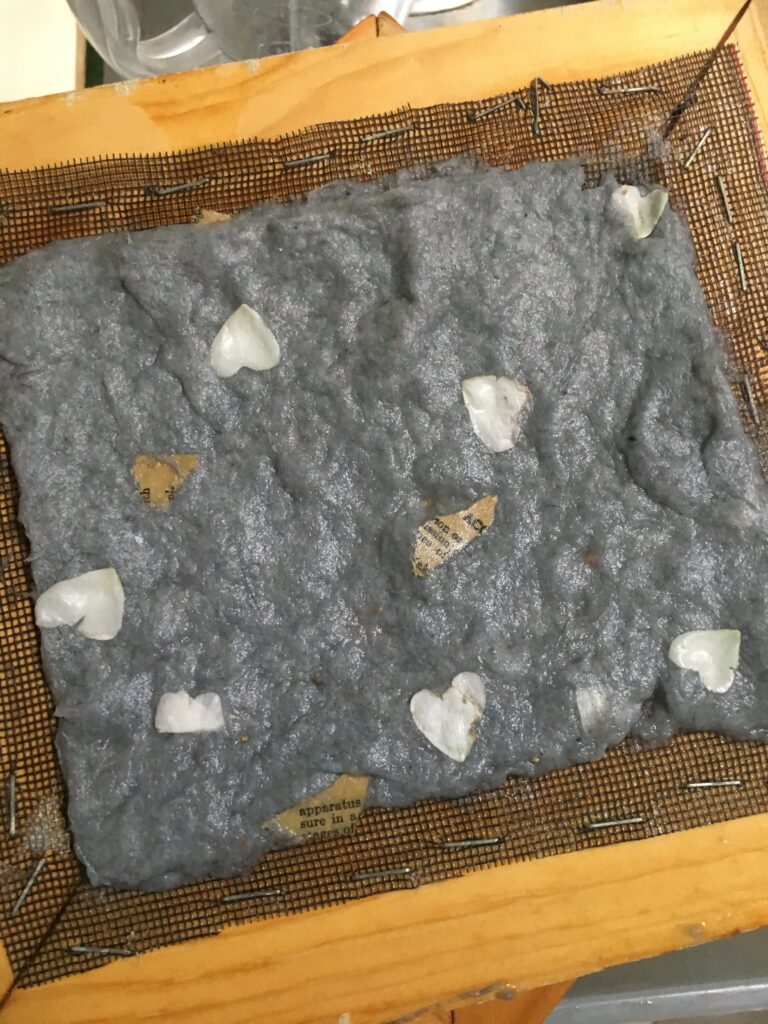
At this point you can add dried flower petals, bits of thread, pieces of other paper, or anything else to decorate your sheets of paper.
Immerse the mold and deckle into the water — holding them firmly together — from one side, to get the tools under the pulp. Lift the mold and deckle up together, catching the pulp. Try to get a thin even layer cross the mold.
Let water drain off the pulp, then carefully dab with the sponge to press more water off, but without messing up the layer of pulp.
Carefully remove the wet paper, and place on towel or old clothing. Cover with another dry part of the towel, and place under a stack of books to press until dry.
Alternatively, dry with an iron. After removing as much water as possible, iron with a medium heat, while paper is between two pieces of cloth. Iron until dry.
Unsurprisingly, using drier lint yields a softer, more fabric-like paper. Using paper scraps as a base will result in a crisper and stiffer paper.
Trim edges for a neat, polished look or leave them raw to highlight the handmade charm of your DIY paper.
Use this paper to make gift boxes, to paint on, as backgrounds in scrapbooks, when framing art works or for other paper crafts.
Tweet @DominionPost.com
