While some businesses and services reopen, following the current “safer-at-home” gubernatorial order means for many of us, our days of not putting on pants continue.
Whether you prefer to wrap up in something comfy cozy or chic (but still comfy) while working from home, a kimono may be the perfect addition to your quarantine wardrobe. The simplicity and versatility of sewing a kimono-style robe or jacket makes this a great project for those with any level of sewing skills.
Better yet, kimono-style unisex robes are simple to make without a pattern, so all you need is your chosen fabric, scissors, thread and either a needle or sewing machine (a machine makes it faster, but sewing one by hand is totally do-able).
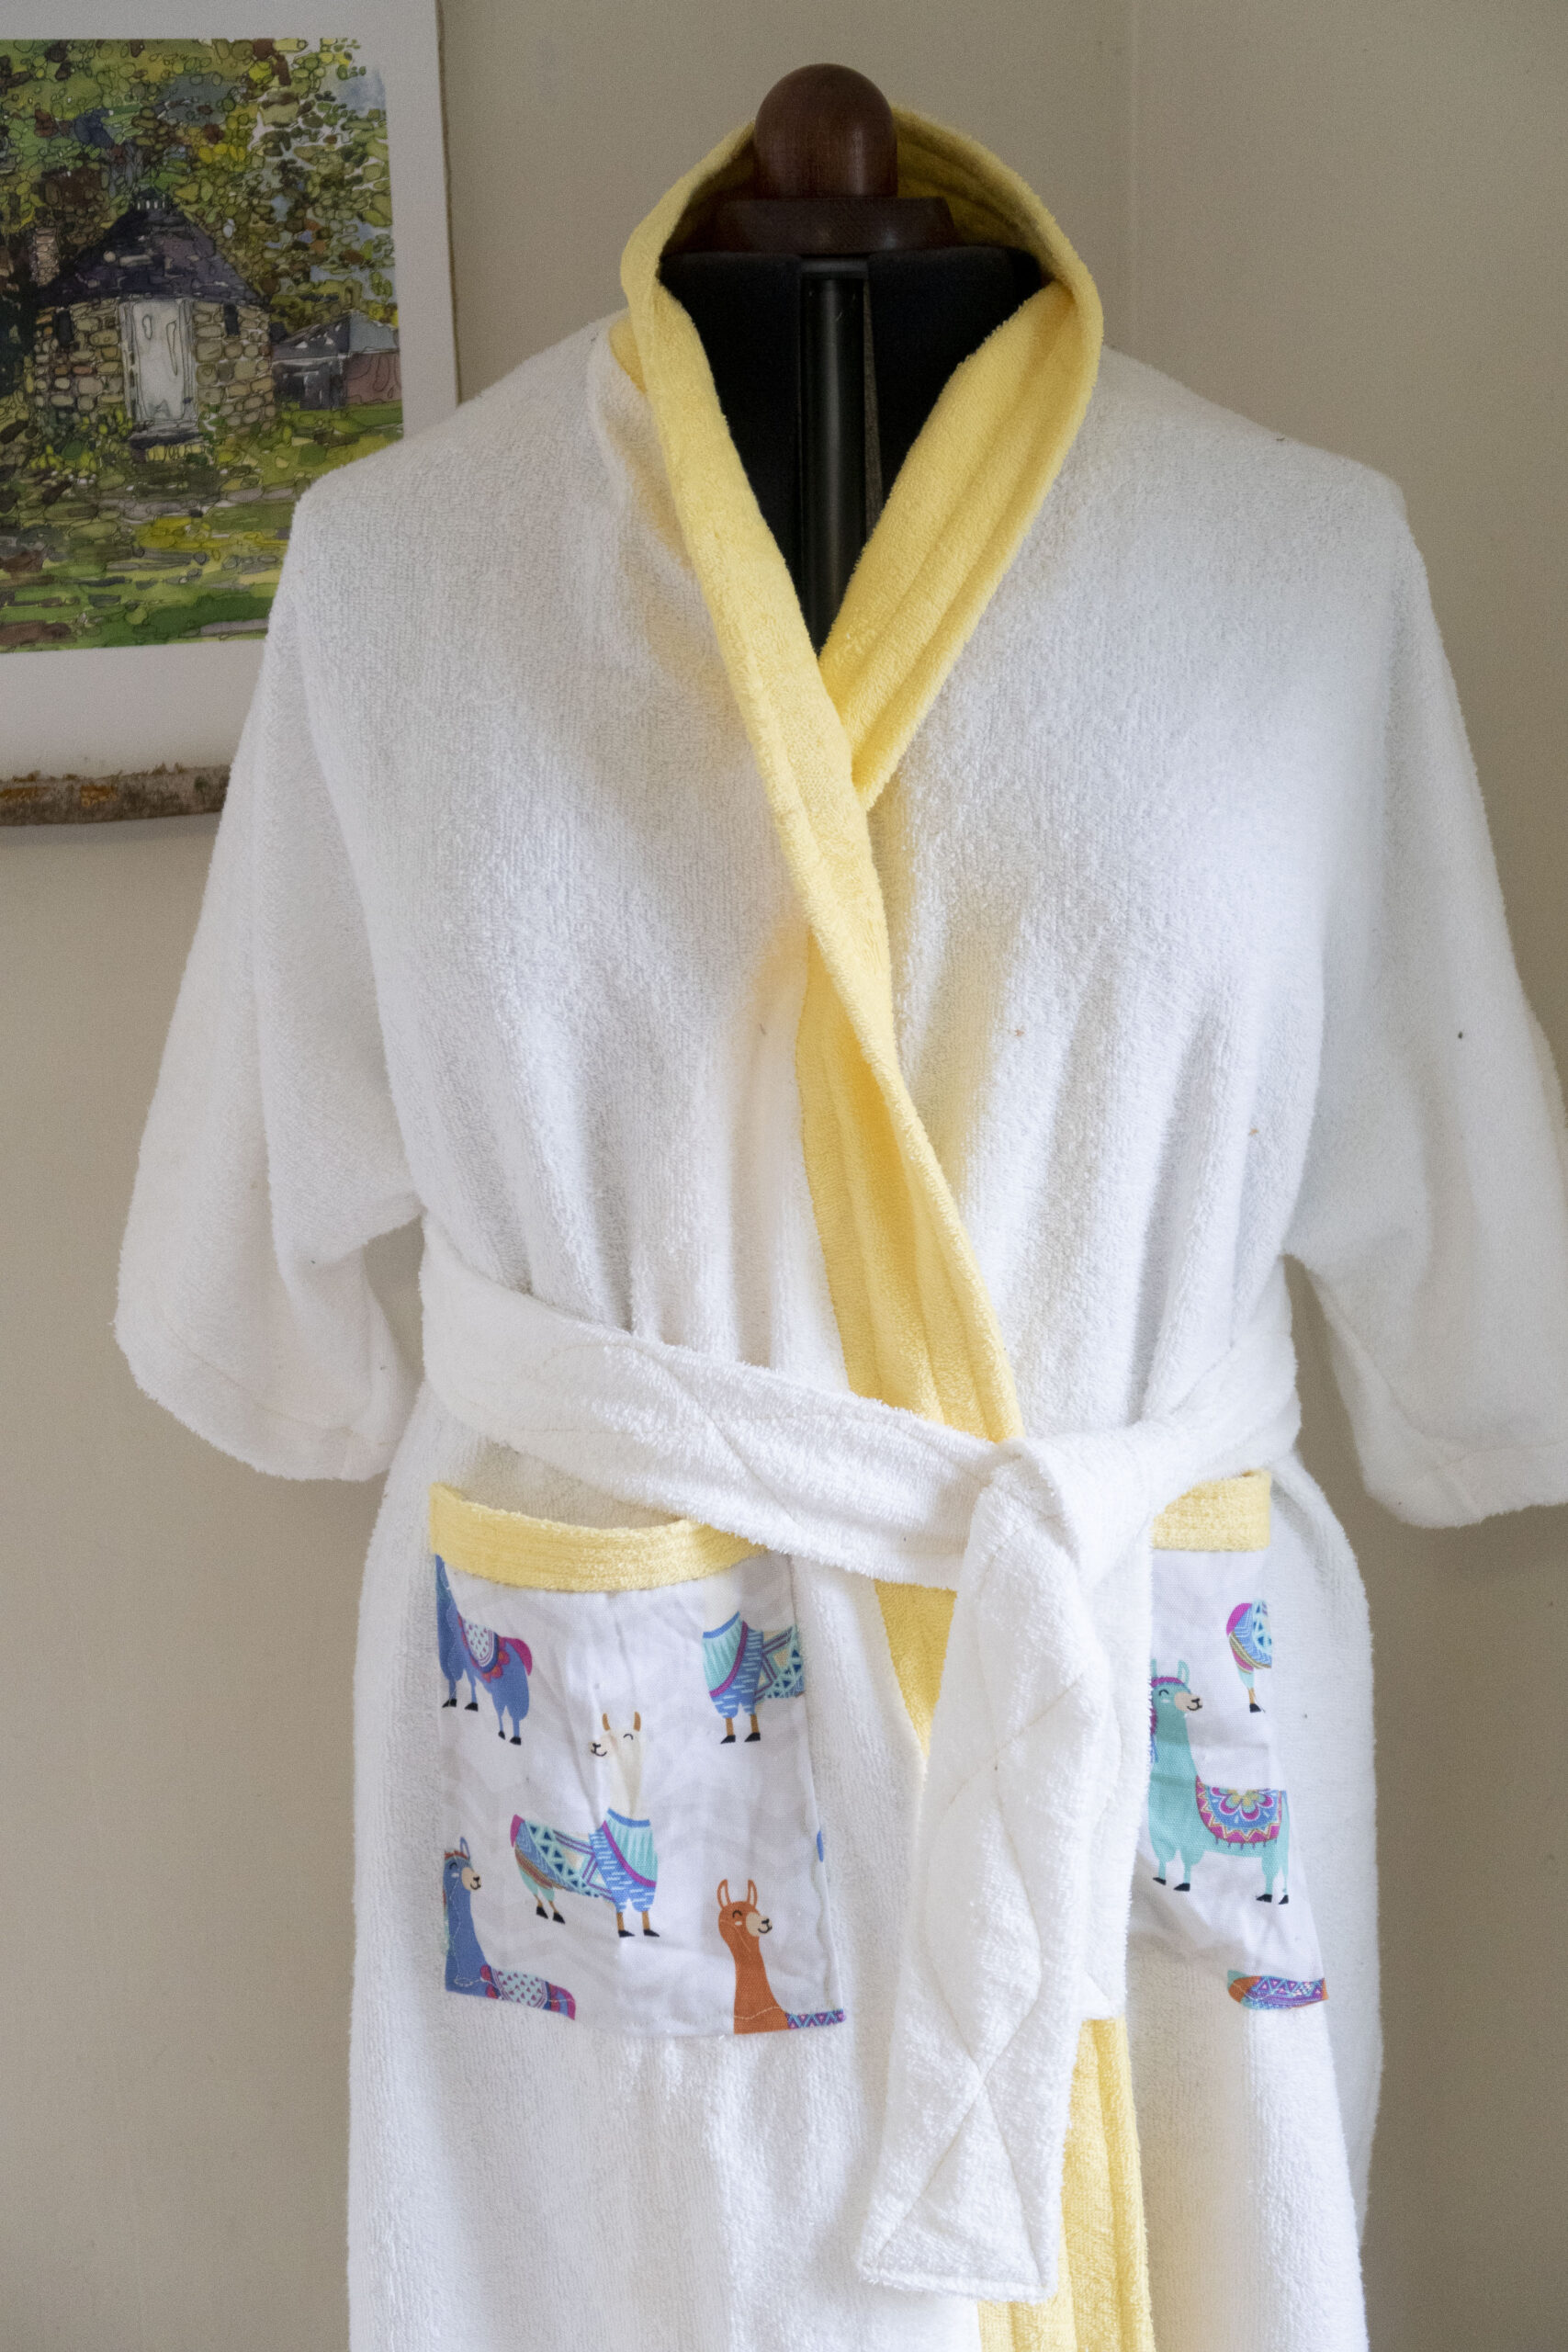
A terrycloth bathrobe is a good choice for a towel-like feel. Use terrycloth fabric, or several beach towels or very large bath (body) towels.
Flannel robes are cozy for wet and chilly spring time weather. Make one using either flannel yardage or flannel bed sheets.
Cotton or linen are comfortable for a warmer weather around-the-house robe, and can also be sewn either from yardage or re-purposed, upcycled bed sheets, or even from a large tablecloth.
Rayon is a comfortable and drapey alternative. Try silk for a fancier, more luxurious robe or jacket.
Any fabric with some drape (i.e. nothing too stiff) works for a kimono robe. You can even make your own patchwork fabric by sewing together fabric strips or pieces.
Pick a color/pattern that will lift your spirits and make you feel stylish and attractive at home.
You don’t need to use these instructions only for robes. You can use them to make a short, cover up jacket to layer for cooler evenings or as sun protection when working in the garden. Or you could sew a kimono-style shirt, to stay comfy and cute when you do have to leave home. Make a face mask out of the same or a complimentary fabric to take your pandemic style to the next level.
Instructions
A kimono robe is made of three cuts of fabric; two front pieces and one back. You can add a collar, pockets, facing, or cut the sleeves separately if that is easier with the width of fabric you are using.
If cutting the sleeves separately, your pieces will all be rectangles. If cutting the sleeves in one piece with the front and back parts, your pieces will be L shaped. For ease of sewing, soften the inner corners of the L to a slope rather than right angle.
Cutting the back section on the fold of the fabric is best, but add a seam in the middle if your fabric width does not allow for a cut on the fold.
To determine the size of your robe, take your measurements — measure your neck, neck to wrist/where you want the sleeve to end, your chest and hips (or waist, if you are making a shirt rather than a robe), and neck to knee/however long you want your kimono to be.


For a traditional kimono cut, cut out 3 rectangles of the length you want for your finished kimono, plus 5-6 inches for shoulder seams and hem allowance: one for the back, half the desired width of the finished kimono (plus a seam allowance of a couple of inches), and two for the front, each one-quarter the width of your finished width, plus a couple of inches.
Sew the fronts to the back at the shoulders, leaving a neckline opening at the center of the back.
Next, cut out two rectangles for the sleeves. For wide sleeves, make two opposite sides 32 inches. (narrower for narrower sleeves). Make the other two sides the length that you want your sleeves to be.
Sew width side of the sleeve rectangle to the front and back, centering it on the shoulder seam.
Sew the side seams together, lining up the sleeve/body seams front and back, sewing from sleeve hem down to body hem.
Shape the front opening as desired. A traditional opening is a slight diagonal decreasing the width of the fronts from hemline to neckline.
To cut the sleeves in one piece with the body of the fabric, you will need a wider fabric.
Lay your fabric out flat, folded in half, twice the length that you want for your kimono, plus 5 or 6 inches for the shoulder seams and for the hems. If your fabric is wide enough, or if the width matches the length you want, you can cut your pieces out next to each other.
The fold and each seam should be parallel to the fabric edge (selvedge). You will cut the two front pieces together at the same time, and if possible cut the back pieces on the fold, so you have just one back panel.
If your fabric is too narrow to fold (if you have narrow yardage or if you are using towels, for example), you will need four times the intended length of your robe plus several inches for seams and hems.
If you cut the sleeves and body in one piece, cut as if you were adding a rectangle onto the body of the kimono at each side top.
Each added rectangle will be 16 inches wide and the desired length of your sleeve.
The width of each side (front and back) at the top will be the measurement from your neck to your chosen sleeve length, plus an inch or two for hemming. Cut the fabric at that width for a length of 16 inches (for wide sleeves; shorter if you want narrower sleeves). This will be the length from your shoulder to the armpit of the robe.
For the body of the kimono below the rectangle sleeve, use the widest of your chest, waist or hip measurements and divide it by four — for each piece and two halves of the back. Add at least 1.5 inches for ease — this will give you just a small overlap in the front. For a larger overlap, add more ease. Each quarter inch you add gives you one inch of overall ease. For a cozy wrap bathrobe, add 3 inches ease in the front, and 2 for the back.
Below the 16 inches (or for whatever sleeve width you want) length from shoulder to armhole, cut the fabric straight across to the width that you have decided on for the width of the body of your robe, as described above. You can curve the corner where the sleeve and body meet, for an easier to sew seam.
Make the robe as long as you’d like, and angle the neck and front opening as you choose — a slight diagonal, narrowing the width of the robe from hem to neck is a good place to start.
Sew each front to each side of the back at the top of the sleeve, from neck to the end of the sleeve.
Sew the side seams together, each front to each side of the back, from sleeve ends to the hemlines.
Choose a finish for the front opening. Double over a strip matching or contrasting of fabric the length of the front opening, and sew that on for a collar and front edge; or sew a strip of fabric on the opening for an inside facing; or bind the edges of the opening with bias tape.
Add patch pockets if you want, in a matching or contrasting fabric.
Cut a rectangle to make a sash, double your chosen width. Sew long edges together with wrong side together, and then turn right side out. For a finished look tuck ends in and stitch together.
There are few rules to making a successful kimono robe, lots of space for creativity, and no rules that say you can’t feel comfy and cute at the same time.
By Aldona Bird
